Nintendo 3DS System Transfer – workflow fail – what were they thinking?

Nintendo System Transfer – the real world story

Nintendo now offers the ability to transfer games (purchased from Nintendo DSWare store) and some information from DSi to 3DS devices.

This function as announced when the 3DS was launched, but has only recently (December 7) become available. The absence of this function prevented me from buying a 3DS, as I’ve invested in some DSWare games that I wanted to move over to the new device.

Well now the System Transfer function is there, let’s go.

Oh. wait. There are some issues…

1. Post transfer your DSi is bricked. Trade it in.

The System transfer is a single use, one way process. After you’ve transfered all of your information, then you’ll have no further use for the DSi. It is reformated, and doesn’t even remember your name. So, you’ll want to trade it in. Thankfully EBGames will trade in a DSi and give you $70 for it. https://www.ebgames.com.au/trade/trade-what.aspx

Got to thank the EB Games staff for putting up with (and learning about) how retarded this process is. It tied up one of their staff for nearly two hours.

2. You need to install the System Transfer App from the DSWare shop before you take it to the shop to trade in.

Assuming that you want to make the transfer, then you’ll want to install this System Transfer App before you leave home.

3. Buy your new 3DS.

Make sure that the shop that you buy it at has fast Internet access via WiFi, that is available for customers, and enough power points to enable you to plug in BOTH 3DS and DSi.

4. Upgrade 3DS system software to version 3.0.0 or greater.

When you get the 3DS it will not have the required 3.0.0 system software to enable it to receive the System Transfer. You will need to turn on and then find a WiFi access point with fast access to the Internet.

If the shop doesn’t provide this capability, then you’ll need to provide your own portable WiFI access point. Connect your new 3DS to the desired access point.

You will need to plug in the portable handheld 3DS to its 240V charger before it will perform a system upgrade. Find a power plug.

On my high speed home Internet access, a 3DS system upgrade took 15 minutes. Using my Android Hotspot on a very dodgy 3G network the system upgrade took 90 minutes.

Find somewhere to stand around in the shop without looking too much like a pedo. Or go get a long lunch. Don’t forget to put your phone on silent (when using it as a portable access point) at the shop, if you decide to go for lunch.

5. Initiate System Transfer on the DSi application.

You will need to plug in the portable handheld DSi to its 240V charger before it will do a System Transfer, if it is not fully charged. Find another power plug.

6. Initiate System Transfer on the 3DS settings menu.

You need to keep the 3DS plugged in, as it isn’t properly charged yet. It has only been 90 minutes charging in the shop.

7. Wait at least 30 minutes for the System Transfer to complete.

In my case with only a few games to transfer it was completed in only 30 minutes. Some reports place this time at up to and beyond an hour.
Again, find somewhere in the shop to stand and wait. Try not too look guilty or bored.

8. Enjoy your new 3DS

Whilst the System Transfer works as advertised, clearly Nintendo has put no thought into the actual real-world transfer process.

Why would they NOT expect you to trade-in your DSi on purchase of a 3DS? It is clearly described by Nintendo that the old DSi is useless after you’ve completed the system transfer.
Why would they expect retailers to provide high speed internet access and supply masses of 240V power outlets to enable the system transfer to be done at point of sale?
Why would they expect customers to stand around in shops for at least 30 minutes, and more often 90 minutes, waiting for the system update and system transfer to finish?
Grrr! A case of workflow fail!
– End-of-Rant- 
Another commentary on how to do the transfer, but they didn’t comment on how long it takes to do the 3DS system upgrade before you can do the system transfer. They also didn’t point out that the newly purchased 3DS will need to be charging off 240 V before it will make the transfer.

Nintendo says: How to Transfer DSiWare to the Nintendo 3DS

Description:

Step by step instructions on how to perform a system transfer from the Nintendo DSi to the Nintendo 3DS.

Important Notes!

  • Before starting this process make sure you that the “Nintendo 3DS Transfer Tool” has been downloaded on the Nintendo DSi. (How To)
  • To complete the system transfer you will need both your Nintendo 3DS and Nintendo DSi systems, the wireless data transfer application for the Nintendo DSi, and access to the Internet.
  • What To Do:

    On the Nintendo 3DS:

  • Select the System Settings icon from the HOME Menu and tap “Open.”
  • Tap “Other Settings” and then tap “System Transfer.”
  • After the system connects online, tap “Transfer from Nintendo DSi” and then “Next.”
  • Then tap “Receive from Nintendo DSi.”
  • On the Nintendo DSi/DSi XL:

  • Tap “Nintendo 3DS Transfer Tool.”
  • After the system connects online, tap “Transfer to Nintendo 3DS” and then “Next.”
  • Now tap, “Send from This System.”
  • The name of the Nintendo 3DS that will receive the data will appear on the touch screen of the Nintendo DSi. Tap it to proceed.
  • On the Nintendo 3DS:

  • Tap “Yes” to confirm that you want to receive the information from the Nintendo DSi listed on screen.
  • On the Nintendo DSi/DSi XL:

  • Tap either “Full Transfer” or “Custom Transfer.”
    • Tapping “Full Transfer” will transfer the Wi-Fi Configuration Data, Photos and Recordings, and any purchased Nintendo DSiWare.
    • Tapping “Custom Transfer” will allow you to select what you want to transfer to the Nintendo 3DS.
  • After selecting what you want to transfer, tap “Transfer” and then “Next.”
  • Tap “Transfer” again to confirm each type of data that will be transferred
  • Finally, tap “Transfer” one last time to confirm the transfer and complete the process.
  • On the Nintendo 3DS:

  • After the transfer is finished, tap “System Settings” to return to the Nintendo 3DS settings menu.
  •  

    Review of (Amazon) Panasonic Lumix G X Vario PZ 14-42mm/F3.5-5.6 Lens

    Amazon.com
    Thanks for submitting a customer review on Amazon. Your review could not be posted to the website in its current form. While we appreciate your time and comments, reviews must adhere to the following guidelines:
    We encourage you to revise your review and submit it again. A few common issues to keep in mind:
     
    • Written reviews must be at least 20 words long. The ideal length is 75 to 500 words.
    • Your review should focus on specific features of the product and your experience with it. Feedback on the seller or your shipment experience should be provided at www.amazon.com/feedback.
    • We do not allow profane or obscene content. This applies to adult products too.
    • Advertisements, promotional material or repeated posts that make the same point excessively are considered spam.
    • Please do not include URLs external to Amazon or personally identifiable content in your review.
    We welcome your honest opinion about products – positive or negative. We do not remove reviews because they are critical. We believe all helpful information can inform our customers buying decisions. If you have questions about the product or opinions that do not fit the review format, please feel free to use the Customer Discussions feature on the product page.
    This review is from: Panasonic Lumix G X Vario PZ 14-42mm/F3.5-5.6 Lens for Panasonic Lumix G-Series Digital Cameras (Electronics)

    This is the THIRD TIME I’ve written this review.

    Amazon if you are not happy with a bad review, why do you bother to ask me to write one?

    THIS TIME I’m quoting your tips on writing a great review. Please be specific as to why you don’t publish my review.


    Tips on writing a great review

    * Include the “why”: The best reviews include not only whether you liked or disliked a product, but also why. 

    I don’t like this product, because it was announced and released for order in September, but still hasn’t shipped three months later. Panasonic should make their products before they announce them.

    * Be specific: Your review should focus on specific features of the product and your experience with it.

    The product is not available yet. Pre-announcing, and not following up with some kind of feedback is not appropriate.

    * Not too short, not too long: Written reviews must be at least 20 words and are limited to 5,000 words. 

    This is the right length.

    * Be sincere: We welcome your honest opinion about the product–positive or negative. We do not remove reviews because they are critical. We believe all helpful information can inform our customers’ buying decisions. 

    This is my true feeling. Get your product right before announcing, Panasonic.

    * Full disclosure

    I am paying for this product.

    What’s not allowed

    Objectionable material: 
    * Obscene or distasteful content 
    * Profanity or spiteful remarks 
    * Promotion of illegal or immoral conduct 

    NIL

    Promotional content:

    NIL

    Inappropriate content:

    People should know that Panasonic doesn’t actually have this product. Is not writing a review about this fact very relevant to potential customers? 


    AVR Pong – Peggy2 & Danger Shield

    This post should really be titled “AVR Pong, and some other non-firsts”.

    Avrpong

    I saw the Peggy2LE and decided that it was something that I just had to have. I mean, 625 LEDs on one board can’t be bad, right? Well at least that was what I thought, until I tried to solder 1250 LED leads in one night.

    Peggy2le

    Anyway, to make a point out of this, I decided to make a Pong game, using the Peggy2 and a Danger Shield courtesy of Little Bird Electronics

    So why is this interesting? Well there are somes significant firsts in there for me.

    1. Not just multi tasking (using freeRTOS), but real multi-processing using 2 AVR devices. The two AVRs communicate using the I2C bus.
    2. Developing an I2C code base that can simultaneously be Master and Slave, and is interrupt driven. I hope that the code can do MultiMaster too, but I haven’t fully tested it.
    3. Building a robust efficient video transfer protocol between the game mechanics AVR and the video (Peggy2) AVR. Using prioritised row updating and a CRC8, which I think it is pretty robust.
    4. Building a buzzer routine that can play melodies, with real notes, again fully interrupt driven, using Timer 2 (the Danger Shield buzzer is connected to PD3).

    None of these things are original. In fact most of the code is borrowed from elsewhere, and the sources can be found in the files. But, I’m pretty stoked to have made it all work together, under freeRTOS. Small things, as they say, amuse small minds.

    Code at AVRfreeRTOS at Sourceforge.

    Updates with more detail when it is not so late.

    Our NBN; make it better, please

    I’ve written my personal thoughts on the difficulties in creating a successful outcome for the NBN in Australia previously  in Our NBN is an Engineering Fail.

    And today I made some comments on the “jumping the shark” article on ZDNet, which got me soundly voted off this small Island. Jumping the shark.

    But, before I pack my bags and depart, I thought that I should leave some positive words on what the NBN Co could do better, and remove my humble objections to the path they’ve taken.

    1. Commit to a public “rising tide” deployment strategy.

    The principal of providing broadband access to all of Australia is commendable, and should be pursued. But, the current deployment strategy is opaque and leaves us open to believe that it can be gamed for political grounds.

    Secondly, it is clear that as a result of the existing deployment strategy, existing functional high performance broadband networks are destined to be switched off earlier than necessary.

    The deployment strategy should pursue the path of providing broadband to those with no broadband first, before any customer with an existing DSL service is overbuilt. Once this is achieved, then those with a ADSL 1 or other slow or older broadband technology should be over built.

    Radio and satellite deployment schedules should clearly be continued.

    Obviously this strategy would reach those with ADSL2+ next to last, and those with HFC network access last of all. This is a good thing, as it would focus the initial effort and money on the areas where no network service currently exists.

    This deployment strategy would allow the average national broadband speed to float quickly upwards on a “rising tide” of performance, as the lowest performance outliers are removed.

     2. Devolve all vendor contracts into contestable segments of no greater than $100 million.

    There is no technology that can’t be devolved into contestable packages of around $100 million or less. The idea that the NBN Co can sign off exclusive contracts for $1+ billion dollars, without any competitive options, and without sufficient in-house resource for intense contractual performance scrutiny, is just lunacy.

    Experience shows that smaller contracts ensure that deliverables can be more closely aligned with outcomes, and are much less likely to have significant cost over runs. Agile delivery of outcomes is required here.

    3. Establish competitive tension in procurement.

    The NBN Co should ensure that each and every technology package is procurable from at least 2 geographically diverse technology vendors, with demonstrably different supply chain mechanics. It takes just one geo-tectonic event (Icelandic dust clouds, or tsunami for example) to lay waste to an entire geography for months. Disruptions to a single vendor’s supply chain should not have a downstream effect on every supplier to the NBN and the resulting build schedule.

    Vendors also sometimes take mis-steps in their development processes, leading to obsolete equipment being placed into the field. Over a 10 year build process, it is relatively difficult to keep watch that procured equipment remains fresh, when no competitive tension is in play.

    NBN Co should ensure that two “equal” vendors are selected for each and every contestable product and service segment, and that no favoured vendor is driving the NBN Co architectural outcomes.

     4. Recognise NBN Co is a utility and national standards provider and rewrite their business plan based thereon.

    The political expediency to have a “positive” business case has shackled the NBN Co to an unrealistic build schedule, and elevated long term wholesale costs to Retail Service Providers.

    The NBN Co should be recognised as a utility, and our wholesale network provider of last resort, to provide a broadband service where no commercial service provider is prepared to invest for a commercial return. And in return, the NBN Co should be freed from the need to cross subsidise from low cost urban deployments to higher cost deployment regions.

    NBN Co should be financed from general revenue, in the same way that other major infrastructure projects are financed.

    NBN Co should tender for operating companies to build and operate geographic sectors of the Australian continent’s fixed wholesale network infrastructure (based on the “rising tide” principal above) to the standards set by NBN Co, to secure the maximum involvement from private enterprise.

    freeRTOS and libraries for AVR ATmega with Eclipse IDE

    I’ve created a Sourceforge project as a place to host all my current tools and working environment. The Sourceforge site is now 4 years old, and there’s a GitHub site too, which is now the most up to date repository

    Preferred: Github freeRTOS & libraries for AVR ATMEGA

    Secondary: Sourceforge freeRTOS & libraries for AVR ATMEGA

    The Sourceforge repository has become so complex, with so many libraries, I thought that it was about time to make a simple version, which has the minimum implementation to get started. No additional libraries included. One timer option, using the watchdog timer. One heap option, using avr-libc malloc. One example application, just a blink with two tasks, for Uno, Mega, and Goldilocks boards.

    Github minimum AVRfreeRTOS

    The thing about open source. Sometime you have to give back.

    Things I’m really happy about:

    • Arduino Uno family ATmega328p, Freetronics EtherMega (Arduino Mega2560), and Goldilocks ATmega1284p, scheduling and IO works.
    • Being able to use any Timer on the AVR as the system Tick. In practice this means Timer0 on 328p (Arduino Uno), Timer3 on 2560 (Arduino Mega) and 1284p (Pololu SVP) and Timer2 on 1284p with 32.768kHz watch crystal (Freetronics Goldilocks). The watchdog timer has also been implemented, and if there is no critical need for accurate timing, this is the lowest resource impact system tick.
    • Converting all of the relevant libraries to be friendly to a RTOS system. No delay busy-wait loops etc. Everything defers to (is interruptible by) the scheduler when waiting, or is driven from interrupts.
    • Having many finished projects, that are good demonstrations of lots of AVR and freeRTOS capabilities.
    • Having the Sparkfun LCD Shield working properly, with printf string formatting.
    • Having the Rugged Circuits QuadRAM 512kByte and MegaRAM 128kByte RAM extensions working on ATmega2560.
    • Porting ChaN FatF microSD card support for a variety of uSD shield cages.
    • Porting Wiznet W5100, W5200, and W5500 drivers for Arduino Ethernet shields.
    • Porting Wiznet and uIP DHCP and HTTP applications, creating options for implementing a basic web server.
    • Properly implementing semaphores for access to resources (ports, interfaces, ADC, LCD).
    • Properly implementing queues for transferring data between tasks (threads).

    The repository of files on Sourceforge freeRTOS & libraries for AVR ATMEGA is a working collection for a freeRTOS based platform using the AVR-GCC and AVRDUDE platform. The development environment used was Eclipse IDE.

    With the Eclipse IDE the C Development Environment (CDE), and the AVR plug-in are both needed. It is assumed that the AVR avr-libc libraries are installed.

    The freeRTOS folder contains the most recent version 8.2.3 of freeRTOS, but it has been abridged down to only those files relevant for AVR GCC. The port.c file has been extensively modified to allow the use of either of the 328p Timer0 or Timer1 timers. And, the use of Timer3 on the Pololu SVP which has uses a 1284p. Timer 3 for Arduino Mega using a 2560 also works. Timer2 support has been added for the Freetronics Goldilocks and its 32,768kHz crystal. A Real Time system_tick is added using time.h functionality added to the system libraries described below.

    The freeRTOSBoardDefs.h file contains most of the variables that you’ll need to change regularly.

    There are some relevant and often used libraries added to the basic freeRTOS capabilities.

    • lib_io: contains often used I/O digital and ADC routines borrowed from Pololu.
    • lib_io: contains the tools to use the TWI (non-trademarked I2C) bus. It contains integrated interrupt driven master and slave routines
    • lib_io: contains the tools to use the SPI bus.
    • lib_io: contains routines to drive the serial interface. there are three versions; avrSerial for use before the freeRTOS scheduler has been enabled, and xSerial for use during normal operations. xSerial is interrupt driven and uses an optimised ring buffer. xSerialN is further generalised to allow multiple simultaneous serial ports.
    • lib_ext_ram: contains routines to drive the Rugged Circuits QuadRam on Arduino Mega2560, or Freetronics EtherMega.
    • lib_util: Optimised CRC calculations.
    • lib_util: Extended alpha (string) to integer (binary, octal, decimal, hexdecimal) conversion.
    • lib_time: Real time calculations, from avr-libc upstream, providing esoteric time and date calculations.
    • lib_rtc: drivers for the DS1307 RTC using I2C.
    • lib_fatf: contains ChaN’s FatF FAT32 libraries for driving the microSD card.
    • lib_iinchip: contains the W5100 drivers and the W5200 drivers from Wiznet.
    • lib_inet: contains a DHCP, and HTTP implementation.
    • lib-uIP: contains the uIP implementation derived from Contiki2.7, implemented on MACRAW mode of W5100/W5200, and extensible.
    • lib_ft800: contains optimised drivers for the Gameduino2, a FTDI FT800 implementation, with LCD and touch screen support.

    Some more recent posts are here:

    Arduino AVRfreeRTOS

    Goldilocks Analogue Synthesiser

    Goldilocks Analogue Prototyping 4

    Melding freeRTOS with ChaN’s FatF & HD44780 LCD on Freetronics EtherMega

    Rugged Circuits QuadRAM on Freetronics EtherMega

    Quick review of Freetronics EtherMega

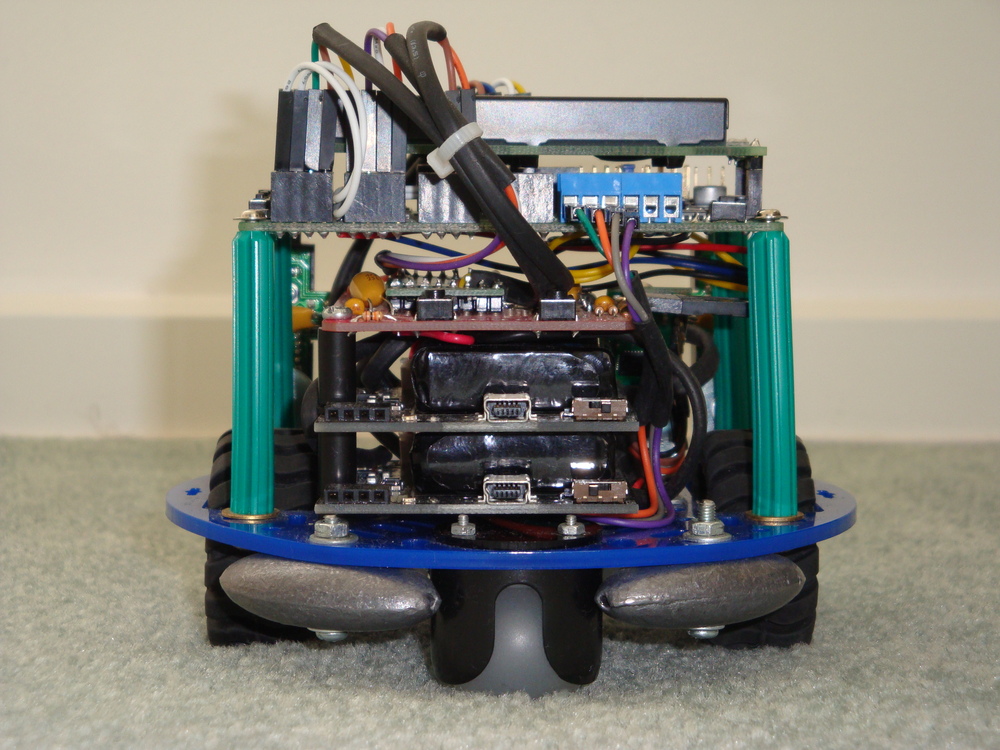
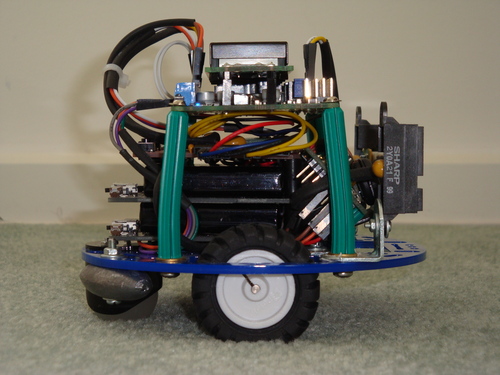
    Description of the AVR Pong multi-processor game.

    Additional steps to use the Mega2560

    EtherMega (Arduino Mega2560) and FreeRTOS

    I sell on Tindie

    Step-by-step Instructions

    Our Destination:

    On completing these instructions you should have an Eclipse IDE (Integrated Development Environment) installed with all relevant libraries installed, to use the freeRTOS, and the libraries I’ve modified, to build projects (Eclipse term for a set of code) of your own.

    We’re Assuming:

    These instructions are based on an Ubuntu LTS install, but the path to the destination is not complex, and can be roughly followed for any installation platform.

    Step 0. As usual on an Ubuntu (Debian) system, refresh the software sources.

    sudo apt-get update

    Step 1. Install the AVR Libraries.

    Together, avr-binutils, avr-gcc, and avr-libc form the heart of the Free Software toolchain for the Atmel AVR microcontrollers. They are further accompanied by projects for in-system programming software (uisp, avrdude), simulation (simulavr) and debugging (avr-gdb, AVaRICE).
    sudo aptitude install avr-libc avrdude binutils-avr gcc-avr gdb-avr

    Step 2. Install the Arduino environment.

    Doesn’t hurt to have the Arduino environment available. It can be used for programming boot-loaders (using AVR-ISP code), and generally for checking health of equipment, using known good example code.

    This will pull in some extra libraries that the Arduino platform needs.

    sudo aptitude install arduino


    Step 3. Install the Eclipse IDE.

    It is not necessary to use or install an IDE to develop with freeRTOS, or with any other system. It is easy to use makefiles and the command line with avr-gcc and avrdude. In fact, I didn’t use Eclipse for a long time. And, when I first started to use it, it felt very unnatural and clumsy.

    However, now I’ve been using it for some time I highly recommend it, for the ability to see deeper into the code (definitions are detailed on mouse over), and to compare (live differences) and roll-back code to any step of your editing process.

    Again, installation is easy with Ubuntu (Debian), but it can take a while. Lots of things get installed along with it.

    sudo aptitude install eclipse

    Step 4. Select the C & C++ development tools within Eclipse.

    Eclipse is a Java based platform, but it works just as well with C, and C++, as it does with a wide variety of languages. Getting the C Development Tools (CDT) is the first step to a C environment that we’ll be using.

    Open Eclipse, and lock it to your launcher. You’ll be using it frequently.

    Using the Menus, click:

    Help>>Install New Software…>>Add…

    CDT Indigo http://download.eclipse.org/tools/cdt/releases/indigo

    Select only “CDT Main Features”, and install these plugin development tools.

    Step 5. Select the AVR development environment within Eclipse.

    The AVR environment includes direct access to the avrdude downloading tool for one-click programming of your AVR devices.

    Using the Menus, click:

    Help>>Install New Software…>>Add…

    AVR Plugin http://avr-eclipse.sourceforge.net/updatesite/

    Select “CDT Optional Features”, and install these plugin development tools.

    Step 5c. Select C/C++ Perspective

    First you need to select the right perspective, being C/C++. Top right there is a button showing “Java”. Just to the left is a button (like a window) for selecting perspective. Select

    Other…>>C/C++

    When that is finished, you should have Eclipse menu button containing a AVR* with a green down arrow. That is the button used to program the device.

    Step 6. Define a freeRTOS static library project.

    There are lots of short cuts, and alternative ways to achieve things using context sensitive menus in Eclipse. I’ll concentrate on the top menu bar options, though you can get most things from a context menu click in the right window.

    File>>New>>C Project: AVR Cross Target Static Library: Empty Project

    A static library project is never run by itself. It is always linked to by other projects, called AVR Cross Target Applications.

    Give the project a name (perhaps freeRTOS82x).

    Now a project will apear in the “Project Explorer” window. Select it. We are going to set some options relating to this project.

    Project>>Build Configurations>>Set Active>>Release

    Project>>Properties

    AVR:Target Hardware: MCU Type: ATmega328p (or other depending on hardware)

    AVR:Target Hardware: MCU Clock Frequency: 16000000 (for Arduino hardware or other depending on your hardware)

    C/C++ Build: Configuration: [All Configurations] (make sure this is set for all following configurations)

    C/C++ Build: Environment: AVRTARGETFCPU: 16000000

    C/C++ Build: Environment: AVRTARGETMCU: atmega328p

    C/C++ Build: Settings: AVR Compiler: Optimisation: Other Optimisation Flags: -ffunction-sections -fdata-sections -mcall-prologues -mrelax (and use -Os or -O2)

    Now we are going to add just the freeRTOS files, from the subdirectory within the freeRTOS82x_All_Files.zip file that you have downloaded from Sourceforge, and extracted somewhere sensible.

    File>>Import…>>General:File System

    Select the “into folder” as the project name you just created, and “Select All” for the import on the freeRTOS subdirectory. That should import the entire freeRTOS system. Spend some time browsing, if you like.

    NOTE. Do NOT import the entire contents of the freeRTOS82x_All_Files.zip file. At this stage just import contents of the freeRTOS subdirectory.

    Now we define the include library for the build. Remember to select [All Configurations] first.

    Project>>Properties>>C/C++ Build>>Settings: AVR Compiler: Directories 

    Add the from the “Workspace…”: freeRTOS82x/include

    “${workspace_loc:/${ProjName}/include}”

    Now there are fouralternative memory management routines, explained in the freeRTOS documentation. We are going to use the heap_2.c version, so we need to exclude the other three files from the build. In the project explorer RIGHT CLICK (context menu) each one then exclude them.

    ./MemMang/heap_1.c

    ./MemMang/heap_3.c

    ./MemMang/heap_4.c

    Resource Configurations>>Exclude from Build…: Select All

    Following this step, it should be possible to compile the library.

    Project>>Build All

    If there are any ERRORS, then go back and check the configurations for the project. Sometimes they may be changed, forgotten, or otherwise different from what you expected.

    There will be some WARNINGS, relating to the usage of different Timers. I added these warnings to keep these things front of mind, as depending on which hardware I’m using the ./include/FreeRTOSBoardDefs.h file needs to be managed to suit.

    Step 7. Define an Application Project.

    An Application will generate the final hex code that you upload to the AVR with avrdude. This final code is created from the freeRTOS static library code generated above, together with code contained in the avr-libc, and any other linked projects.

    We are going to import the UnoBlink or MegaBlink project as it makes a good example. Without a display, or real-time-clock module, it will only flash a LED. But, least we know it is alive.

    To get started create a new project as below.

     File>>New>>C Project: AVR Cross Target Application: Empty Project

    Give the project a name (perhaps MegaBlink or retrograde).

    Now a project will appear in the “Project Explorer” window. Select it. We are going to set some options relating to this project.

    Project>>Build Configurations>>Set Active>>Release

    Project>>Properties

    AVR:AVRDUDE:Programmer:New…

    Configuration name: Arduino or Freetronics 2010

    Programmer Hardware: Atmel STK500 Version 1.x firmware

    Override default port: /dev/ttyUSB0 (FTDI USB) OR /dev/ttyACM0 (AVR USB)

    Override default baudrate: as or if required.

    AVR:Target Hardware: MCU Type: ATmega328p (or other depending on hardware)

    AVR:Target Hardware: MCU Clock Frequency: 16000000 (or other depending on hardware)

    C/C++ Build: Configuration: [All Configurations] (make sure this is set for all following configurations)

    C/C++ Build: Environment: AVRTARGETFCPU: 16000000

    C/C++ Build: Environment: AVRTARGETMCU: atmega328p

    C/C++ Build: Settings: AVR Compiler: Directories: “${workspace_loc:/freeRTOS82x/include}”

    C/C++ Build: Settings: AVR Compiler: Optimisation: Other Optimisation Flags: -mcall-prologues -mrelax (and use -Os or -O2)

    C/C++ Build: Settings: AVR C Linker: General: Other Arguments -Wl,–gc-sections

    C/C++ Build: Settings: AVR C Linker: Libraries: Add “m” without quotes. m is the standard math library, which should be included in most projects.

    C/C++ Build: Settings: AVR C Linker: Objects: Other Objects Here you need to add the compiled freeRTOS library. And this is the only place where the Debug and Release builds are different.

    With Release Build selected, paste “${workspace_loc:/freeRTOS82x/Release/libfreeRTOS82x.a}”

    With Debug Build selected, paste “${workspace_loc:/freeRTOS82x/Debug/libfreeRTOS82x.a}”

    Or select the Workspace option to navigate to the actual assembler files to be linked into the project.

    Project References: freeRTOS82x ticked.

    Now we are going to add the MegaBlink (or retrograde) files, from the MegaBlink.zip (or retrograde.zip) file that you have downloaded from sourceforge, and extracted somewhere sensible. If you downloaded the freeRTOSxxx_All_Files.zip, you have all the sources.

    File>>Import…>>General:File System

    Select the “into folder” as the project name you just created, and “Select All” for the import. That should import the 2 files shown inro the project file system. Spend some time browsing, if you like.

    Following this step, it should be possible to compile and link the project.

    Project>>Build All

    If this step completes successfully, with no additional ERRORS, then the final step is to upload the new application into your Arduino or Freetronics device.

    Make sure that you have your device plugged into the USB port, then simply hit the AVR* button in the row of buttons. You will see some green text showing the status of the upload, finishing with the words

    avrdude done. Thank you.

    Now, you should have a flashing LED.

    Now you can import any additional projects, in the same way.

    Step 8. Things to watch.

    Turn on the serial port by removing the comments around the serial port definitions, and watch to see aspects of the program in action.

    Expect to manage the amount of heap allocated in the ./include/FreeRTOSBoardDefs.h file, to ensure that the total SRAM utilised (as noted in the final linker stage when using heap_1.c, heap_2.c or heap_4.c) remains less than 100% or for ATmega328p 2048 bytes.

    Expect to manage the amount of stack space allocated to each task during the set up, to ensure you’re not wasting space, nor (worse) you’re over writing another task’s stack.

    For the Arduino Uno, keep the total number of tasks to below 4, otherwise too much SRAM is consumed in stack allocations.

    Windows 7 Starter with (up to) 128GB RAM

    So most of my computers run a version of Ubuntu, Debian or Android. Used to be contrarian, but these days seems more devices are built on Linux kernels than almost any other type, so I’m just part of the mainstream.

    Unfortunately, I also love the occasional First Person Shooter video game, or spend hours in an immersive Virtual Reality environment. It is an addiction, which I can mostly control. But sometimes, well, game on.

    The one thing that Linux doesn’t do well is gaming. All the best games these days are released on the DX10 or DX11 platform on Microsoft Windows 7. So, like an alcoholic with a whiskey stash, I need to keep a Windows version stashed somewhere to appease the addiction.

    Recently, I purchased a HP Netbook. The Windows 7 system it came loaded with was erased within 90 minutes of unboxing, and that was that.

    When it came to rebuilding and upgrading my gaming machine, I thought why not repurpose that Windows 7 Starter licence as my DX11 gaming platform. A few hours later, with my shiny new Windows 7 Starter SP1 was installed, validated, and perfectly legal, I found only two issues with the Window 7 Starter SP1 operating system.

    1. No Aero. Being used to Compiz on Ubuntu, being stuck on one screen with few decorations seemed pretty last millennium. But since this is a gaming stash, that I will always be playing full screen, there is really no downside.
    2. Limit to 2GB RAM. The Windows 7 Starter version does not support more than 2GB of RAM, though other versions reportedly support up to 4GB. This was a problem for me, as my machine runs much more RAM, and I hate waste.

    Microsoft provides this table describing the limits on X86 (32bit) Windows 7.

    Version Limit on X86 Limit on X64
    Windows 7 Ultimate 4 GB 192 GB
    Windows 7 Enterprise 4 GB 192 GB
    Windows 7 Professional 4 GB 192 GB
    Windows 7 Home Premium 4 GB 16 GB
    Windows 7 Home Basic 4 GB 8 GB
    Windows 7 Starter 2 GB 2 GB

    The dirty little secret

    The secret that Microsoft doesn’t want to tell you is that 32-bit editions of Windows 7 are limited to 4GB is not because of any technical constraint on 32-bit operating systems. All the 32-bit editions of Windows 7 contain the code required for using physical memory above 4GB. Microsoft just doesn’t license you to use that code.

    I sourced the information I’m quoting from Geoff Chappell’s web site, and I’ve found it to be completely true.

    There are other resources on the Internetz and Torrentz that provide some patch code together with mysterious installers that may or may not address the memory limitation issue, too. But, since we’re dealing with the Kernel of my operating system, I was not sure that they would or would not add any Trojans, Malware, or similar. So let’s stay away from that stuff.

    Following the recipe

    Following Greg’s recipe to create a kernel is relatively simple. He lists all the things to do very clearly. I have extracted some of his words below, and modified them for my simple minded clarity.

    The only executable that we’re going to touch is the PAE kernel, named NTKRNLPA.EXE, from 32-bit editions of Windows 7 SP1. The known builds have a routine named MxMemoryLicense in which there are two sequences of nearly identical code, one for each relevant license value. Each sequence calls the undocumented function ZwQueryLicenseValue and then tests for failure or for whether the data that has been read for the value is zero. In the known builds, each sequence has the following instructions in common:

    Opcode Bytes Instruction
    7C xx
    jl      default
    8B 45 FC
    mov     eax,dword ptr [ebp-4]
    85 C0
    test    eax,eax
    74 yy
    je      default

    So the idea is to get A COPY of your NTKRNLPA.EXE and rename it ntkr128g.exe This is the file you are going to patch. Use a Hex/Byte editor to search for the byte string 8B 45 FC 85 C0 74. You will find approximately 25 occurrences of this byte string within the ntkr128g.exe file found in my Windows 7 Starter SP1 system. You need the PATCH THE LAST TWO OCCURRENCES ONLY.

    Both occurrences are to be patched the same way. The patch is designed to vary the ordinary execution as little as possible. The kernel is left to call ZwQueryLicenseValue as usual and to test for failure, but the last three of the above instructions are changed so that the kernel proceeds as if the retrieved data is the value that represents 128GB (which is the least value that removes licensing from the kernel’s computation of maximum physical address). Change the 7 bytes starting from 0x8B so that you now have the following instructions:

    Opcode Bytes Instruction
    B8 00 00 02 00
    mov     eax,00020000h
    90
    nop
    90
    nop

    This means that you replace the last two occurrences of 8B 45 FC 85 C0 74 yy with B8 00 00 02 00 90 90 in the file. Great. You’re done. Well not really. You have to follow Greg’s instructions to add a digital signature to the kernel, so that it can boot properly.

    To add the digital signature, you need to download the Microsoft Software Development Kit, and install the tools (only tools required) to get access to the certification and signing tools to enable the kernel to boot. I did it. It is not hard. Just a little time consuming.

    In Test Mode, the loader relaxes its integrity checking such that any root certificate is accepted. For suitable tools, with documentation, look in either the Windows Software Development Kit (SDK) or the Windows Driver Kit (WDK). To make your own certificate, run some such command as

    makecert -r -ss my -n "CN=On My Authority"

    This creates a root certificate for an invented certification authority named “On My Authority” and installs it in the Personal certificate store, which is represented by “my” in the command. You can view the new certificate by starting the Certificate Manager (CERTMGR.MSC), which also lets you set a Friendly Name for the certificate if you want to keep it. To sign your modified kernel with this certificate, run the command

    signtool sign -s my -n "On My Authority" ntkr128g.exe

    If you want to save some time, you can get a signed kernel here.

    Once you have a kernel, then the rest is pretty straight forward. You need to use the bcdedit command to create an alternative booting information, following Greg’s instructions.

    bcdedit /copy {current} /d "Windows 7 128GB"

    Interesting commands to add to the kernel (which you put back in the same directory as the original NTKRNLPA.EXE, of course) are below

    {guid} refers to the id of the BCD entry that you’re editing.

    bcdedit /set {guid} kernel ntkr128g.exe
    bcdedit /set {guid} testsigning on
    bcdedit /set {guid} pae ForceEnable
    bcdedit /set {guid} increaseuserva 3072

    These instructions tell the BCD boot loader to:

    • Load the ntkr128g kernel.
    • Ignore that Microsoft has not signed it. Treat it as a test kernel.
    • Force on PAE (Physical Address Extension). Which is irrelevant really, as it is automatically turned on when DEP (Data Execution Prevention) is enabled, which is the default case for Windows 7.
    • Increase the maximum amount of memory that a single application can address to 3072MB (up from 2048MB).

    Update

    On December 13 2011 Microsoft released an advisory that updates the kernel.

    The above kernel has been updated to reflect this change and is now version 6.1.7601.17713.

    Everything is working as usual.

    Update

    On April 10 2012 Microsoft released an advisory that updates the kernel.

    The above kernel has been updated to reflect this change and is now version 6.1.7601.17790.

    Everything is working as usual.

    Update

    In August (around the 16th) Microsoft updated the kernel.

    The above kernel has been updated to reflect this change and is now version 6.1.7601.17803.

    Everything is working as usual.

    Update

    Around 24th October 2012 Microsoft released an an advisory that updates the kernel.

    The above kernel has been updated to reflect this change and is now version 6.1.7601.17944.

    Everything is working as usual.

    Update

    Around 13th April 2013 Microsoft updated the kernel.

    Update

    Around 2nd November 2013 Microsoft updated the kernel.

    Right click and “Save link as…”  ntkr128g

    The above kernel has been updated to reflect this change and is now version 6.1.7601.18247.

    Everything is working as usual.

    Update

    Around June 2014,  I’ve converted my machine to Windows7 x64. Blame Titanfall requiring x64. So, sorry I’m not maintaining this kernel any further. As of June 2014 everything was working as normal.

    Presto up to 128GB RAM

    Once this kernel is booted, you will note that the screen comes up with a small note in the lower right corner of the Desktop that Windows 7 is in “Test Mode”, which is to no
    te that you’re testing your own kernel. Well great. Thanks.

    Test_mode

    But the good news can be seen on the Resource Monitor, with 8GB of RAM showing.

    Resource_monitor

    That’s it. Testing with real games (eg Battlefield 3) show that over 2.3GByte can be allocated to one application. Game on!

    Dogbot – Post 6 – Back on (PID) track

    Exactly a year has passed since my last post on the Dogbot. I ended up getting very frustrated with my inability to get sensible odometry out of the Pololu Encoders using the Orangutan SVP auxiliary processor, and needed to put the project aside for a while.

    I believe that I spend a good few weeks digging into the code, to see why I wasn’t getting sensible readings from either, or at times both, of the sensors. Then I gave up, and took up an easier challenge being learning PWM control, and started building the Retrograde Clock.

    Recently, I picked up the Dogbot again, and determined that I would make it work. I worked out that one of the Encoders was not right, using my excellent new Seeedstudio DSO Nano. So, then I ordered a new Encoder. At the same time I ordered a new chassis for Dogbot, as the old one was damaged by my cleaner, and decided to replace the medium capacity Liquidware Backpack, used for driving the motors, with a high capacity variety.

    I took the opportunity to rebuild the dogbot onto the new chassis, and to simplify the system to make it more robust. One construction change was to use the Wall Plugs as a flexible structure, and screw into their ends, rather than using them as a spacer with a bolt through the middle. This allowed me to use the ends of the wall plugs as mounting points, because they could be fastened tight. Previously, because of the angles, they had needed to remain relatively loose.

    Dsc04118Dsc04119

    I have removed the rear mounted PIR sensor at this stage. It is easy to add again, at the appropriate time.

    Dsc04116Dsc04117

    Following reconstruction, I found that the Encoders continued to give unusual (wrong) results. Finally, I looked into the details of the encoder outputs again, using the DSO, and realised that their outputs really NEED to be exactly tuned, using the tiny pots, to 50% duty square waves, otherwise the Orangutan SVP cannot get an accurate count. With this fixed, then the Odometry was built up accurately, measuring the count to travel a fixed distance. With this figure, the actual diameter of each wheel can be calculated, and hence the travel required to go in a straight line.

    It is important to note, that Dogbot doesn’t go in anything like a straight line, with full power applied to each motor. The friction, and wheel size differ enough to make it curve quickly from the straight and narrow. So PID is absolutely necessary to keep it running straight. With PID implemented properly then, finally, Dogbot runs straight.

    These photographs are taken with the display indicating two items. On the top line, the target distance, represented in x and y distance to travel, is noted. Also the deviation from correct heading to target. The instruction is requesting Dogbot to travel 50cm along what it has been told is the x dimension. The instruction is also implying that the Dogbot is initially facing in y direction, and needs to rotate its poise 90deg clockwise to face along x, before it begins its travels.

    Dsc04125

    The code is set up to all allow specification of an initial poise, and a final poise, as well as x and y distances to travel, for the Transport Task to undertake.

    The bottom row of the display shows the distance reading indicated by each of the three sensors across the front of Dogbot. Central indication being the I2C ultrasonic sensor, which is very accurate, but not at all directional. Left being the long range IR sensor, and Right being the medium range IR sensor. These sensors are very directional and can differentiate a thin rod or edge of a hand placed in front of them. Combination of these sensors will enable Dogbot to travel safely in a forward direction.

    Not displayed is the output from the I2C thermal sensor. It has been tilted back, so that its vertical array of 8 pixels is looking up from +5deg to +70deg. It can see very small differences in temperature from ambient, which it also reports.

    At this stage my work continues to get the Dogbot to consistently travel from one location/poise to another location/poise. Whilst I have the code in a state that it can achieve this, it doesn’t yet do it consistently, because of variables in the drive system that need to be properly tuned. And, I could improve the code a lot too. The code is a bit amateurish.

    Notes to photographs

    Dsc04122Dsc04121Dsc04124Dsc04123Dsc04127

    Liquidware battery packs have a on/charge switch that effectively isolates the battery. This has proven useful, as I can turn the motors off, whilst still programming the Orangutan SVP. Not designed, but in hindsight very useful.

    To counter sagging voltages, and noise on the supply lines, I have fitted 1uF Tantalum capacitors on all of the sensors. This helps to ensure that they are getting a good supply when they are firing.

    Both Thermal array sensor, and Ultrasonic distance sensor are canted up to get their cone of vision away from the floor. I have left the IR distance sensors facing parallel with the floor, as they don’t get false readings from the floor (assuming it is flat), and I don’t want to miss low objects that might interfere with the Dogbot.

    I added the fishing weights to the rear of Dogbot to ensure it had good balance. It has sufficient weight to rear from the batteries to stand up properly, but when braking it is quite top-heavy. So, the low heavy weight at the rear helps to ensure that it doesn’t tip over.

    Although there are no other items on the motor circuit, I have added some 1nF bypass capacitors on the motors. Can’t hurt.

    It is alive. Here the IR glow from the sensors has been captured by the camera. Perhaps Skynet lives?

    Dsc04130

    My next steps are to finish the Transport Task so that it can reliably go from point to point. Then, I’ll integrate more information into the Transport task from the accelerometer sensors, to improve directional accuracy. Then to build some mapping code to allow obstacles to be located and avoided.

    Elekit TU-879S Stereo Valve Amplifier Kit Review

    Update May 12, 2013

    I was testing my Arduino powered voltage controlled oscillator, when I noticed that the Right channel was very soft. Almost, but not quite, inaudible. Immediately, I suspected that there was a problem with one of the valves but, no, it was something else. Read more at bottom of this post.

    Choosing the Elekit TU-879S

    Looking for a new project, I decided to build a valve (tube) amplifier kit. So, let’s follow the process and see where it takes us.

    I was looking for something that around $100, as a toy to play with. But it seems that that price level is unachievable, so we have to pay more. But, as the purchase price goes up, this thing can no longer be just a toy. It must become a functional durable product, that can actually be used by anyone.

    There are a couple of valve stereo amplifier kits on the market, such as this Stereo Tube Amplifier Kit for under US$200, or this Model 16LS Stereo Integrated Tube Amplifier for US$250. Both looked good, and are cost effective. But, both suffered from the problem that they are built on a breadboard, and leave 300V exposed on open wires. Ok for a toy, but unusable in the long run for family members, or even my own careless fingers.

    Some further research on the Internetz turned up the Elekit TU-879S, which seems to fit the requirements exactly. Less than AU$1,000 so it can be imported to Australia with no GST issues. Kit looks very well made, and professionally presentable. No loose HV wires to electrocute anyone. And, most importantly a very strong user community who have built and use the Elekit TU-879S in their audio systems, and provide input on modifications and improvements.

    Oh. Oh. Think I just hit the “BUY” button.

    Victor Kung at VKMusic created the English instruction manual used by Tube Depot. I just learned that unfortunately, Victor is getting nothing for his translation and original market development work. I suggest that you buy the kit from him directly.

    This kit uses three valves, one a single valve dual Triode voltage gain stage, and two power gain Pentodes driving the output transformers, to produce 8W per Channel. All of the valves are readily available using either New Old Stock (NOS), or new products equivalent manufactured in Russia, or China. My finished version is pictured below, wearing ’58 Telefunken 12AX7, modern production SED Winged “C” 6L6GC, and alternatively ’61 production GE 6L6GC.

    Dsc04094Dsc04097Dsc04096
    Dsc04098Dsc04101

    Research while waiting (on back order)

    There are a couple of excellent reviews of the Elekit TU-879S which I won’t reproduce here. Save to say that they provided some ideas for improving, or hacking, the Elekit TU-879S, and that even before I had built it.

    The first noteworthy improvement is to substitute the decoupling capacitors between the input and the pre-amp stage, and then before the power-amp stage. The Positive Feedback review suggests using VCap capacitors in those locations, and raves about the results. Great, but I’m not about to spend 50% of the total purchase price on 4 components. Let’s look for some cost effective alternatives.

    The Internetz seem to suggest that Mundorf has a good name and quality product, so an order was placed for 4x MCap Supreme capacitors at Madisound Speaker Components. These MCap capacitors have a musical heritage, with dual series counter-wound cores supposedly cancelling impedance effects, but don’t add too much to the project cost.

    The second improvement is to replace the existing dual linear variable potentiometer with a higher grade unit. The provided unit is a $2 ALPS plastic film component. For a little more, with respect to the value of the end product, the TKD 2CP-601S 100K stepped dual log taper potentiometer provides a good alternative. One was ordered from HiFi Collective in the UK. At about $40 it bridges a logarithmic gap in price between the original $2 component, and the ultimate component being a $300 stepped resistor array.

    So with these two modifications, we have effectively upgraded the “small signal” part of the amplifier, where noise and non-linearity have the most effect. There are a number of other modifications suggested, but they are more drastic than simple component selection and replacement, and can wait until after I’ve established what the base-line of performance is for the Elekit TU-879S.

    Valve search

    The 6moons review goes into some of the options available for the Elekit TU-879S. Really, there are so many options around that it is a lifetime of experimentation to find the best valve sound from this amplifier. In fact, half the fun of this kit is reading the Internetz opinions on which valve creates what sort of sound. Often, strong opinions on individual valves are expressed without reference to the rest of the signal chain (pre-amp, speakers, listening environment, etc) such that the argumentation takes on a religious air.

    12AX7 (Voltage Gain)

    There are many many reviews of this 12AX7 valve type. Within these reviews there is one type that stands alone at the pinnacle of sound reproduction, the 12AX7 / ECC83 Telefunken with smooth plates. Luckily TC Tubes has some (one only as I write this) in stock. These valves have a 40,000 hour life time, so there is no problem to buy a “premium new”  test device, with exactly matched triodes. The one that I received from TC Tubes was made in April 1958, and tests Gm 100%/100%, which is about perfect.

    Also as an alternative, there are great reviews of the military version of the 12AX7 being the 5751 which has a lower gain (Mu of 70 vs. Mu100 for 12AX7), and is also extremely low noise. TC Tubes has these GE 5751 in stock too. TC Tubes shipped me a 1961 vintage GE 5751 with matched Gm 108%/108%.

    There are many other alternatives of these valves, and as I mentioned, I think that they are all subject to a lore of selection.

    6L6GC (Power Gain)

    As the Elekit TU-879S accepts a variety of similar Pentode valves, it is difficult to determine which ones should be on the list to try. Cruising the forums, it seems that this amplifier works best with the 6L6GC, which is the same type that it ships with.

    As the power valve has a limited (though long) life of around about 10,000 hours, I am not keen to spend a large amount of money on NOS for this position. So my ideal is to find the “best” modern valve and see what the service lifetime is in practice, before investing in a NOS alternative.

    After looking at some reports at Watford Valves, I decided to get a matched set of SED Winged “C” 6L6GC valves, also from TC Tubes. These will complement the Electro Harmonix valves provided with the kit.

    Once I’m sure that it is a good investment, in terms of sound quality and listening hours, I’ll certainly get some NOS power valves to use.

    Update: I’ve decided to take the plunge on NOS Pentodes, and get some GE 6L6GC from TC Tubes. Reviews of these suggest that it has an excellent performance, exceeding any current production valve though possibly not the best available NOS.

    The construction process

    When you un-box the kit, with the components packed so neatly into 10 heat-sealed individual bags, and each piece of metal wrapped and separated by brown paper, you remember what the Japanese are famous for. OCD grade accuracy. Clearly, this kit is perfect.

    The English translation of the instructions, and the inclusion of a 230V power transformer of the same type as the 100V original, are finesse added by Victor Kung at VKMusic. There is no need to add any further internal photographs of the process. Assembly, for someone who is used to soldering SMD and micro-electronic components, is a breeze. Absolutely everything is explained exactly, and everything is perfectly easily done.

    The English translation has two small (tiny) typos in resistor numbering, which confused me for a minute (also OCD), but looking at the Japanese original instruction cleared up my confusion.

    As the provided resistors are 5% accuracy specification, during the construction process I checked the actual resistance of all resistors before assembly using an accurate digital multimeter, and tried to match closest pairs of resistors to the same circuit position in both Left and Right channels. The thought behind that was that even if the circuit was very slightly off specification because of the tolerance in the resistor values, then at least Left and Right channels would be matched.

    The modification process

    With the Mundorf MCap Supreme capacitors being much larger than the standard polypropylene capacitors they have to be fitted onto the back of the PCB. No problem, there is plenty of space.

    Dsc04081Dsc04080Dsc04079Dsc04078

    The TKD 2CP-601S potentiometer is a little more tricky. Fortunately, the pin-outs are identical to the supplied device, so the volume control PCB can be used. I just needed to kink the pins towards each other slightly to get a fit. The volume circuit PCB shows some minor flux damage, as I had to remove the provided volume potentiometer fitted first for testing.

    The axle housing on the TKD 2CP-601S is slightly greater diameter than that provided, but rather than drilling out the top cover I decided to use a pocket knife to cut “flats” on the two sides of the threads since it almost fit. As the housing metal is aluminium, and it is cut into a fine thread, it is easy to remove enough metal from both sides with a knife to get the potentiometer to fit cleanly into the slot. This could alternatively be done (better) with a small flat file.

    Secondly, the tab on the front face needs to be removed so that it will fit flush with the front panel. Snip with side cutters, and it is gone.

    Finally, the axle is about 5mm longer than that on the provided pot. I used large pliers holding the end of the axle to hold it still, whilst using a small hacksaw, resting against the pliers as a guide, to cut through the soft brass. Easily done. Don’t hold the body of the potentiometer when cutting, otherwise the axle will turn, and you will surely damage it. Use a file to tidy up the cut edges on the axle.

    Testing & listening

    The initial testing and listening was done using the provided Chinese 12AX7 and Electro Harmonix 6L6GC valves. Everything worked well. The amplifier is amazingly quiet on idle. No audible hum at all. If a line level source is connected into one input, with the other input selected, some crosstalk can be heard at high volume. But generally this is not noticeable, and can be removed simply by switching off the alternative source.

    Both the SED and Electro Harmonix valves produce the lovely blue aurora surrounding the valve, when viewed in the darkness. The pictures below try to capture it, but don’t do it justice. The GE valves don’t produce the blue aurora, but that doesn’t affect their excellent sound quality.

    Dsc04085Dsc04088

    Once the proof testing was finished, I replaced the standard valves with the special NOS 1958 Telefunken 12AX7, and the matching 1961 GE 6L6GC valves. Amazing the difference in sound quality. After a few hours of burn-in, I started listening to the U2 War album, and I could swear that Bono started to sound incredibly like Elvis. Some of his spirit must be trapped inside the little glowing bottles.

    Repair Update

    Early May 2013, I was experimenting with a voltage controlled oscillator to see how sine waves would behave, and to test my speakers and my ears, when I noticed that the Right channel had become almost inaudible. I hadn’t previously noticed, or may be I had noticed but had put it down to my speakers being too old.

    I did some standard trouble testing, and found all the valves to be good and also inputs and speakers to be good. It therefore had to be something inside the amplifier.

    I gathered all my tools, slightly concerned that it would be hard to identify what was the problem. I needn’t have worried. The problem was obvious. Burnt black obvious.

    Damage - Before

    Electrically, R13 and R14 are 330 ohm 3W resistors, which provide the current load for the power valves. At idle they should present about 21V on Pin 8 of each of the power valves. In my measurements, the left channel was presenting at 28V and the Right channel at 58V. The significantly lowered current through the Right channel was causing the reduced amplification.

    As soon as I turned the board over, the Right resistor sort of just fell off the board. Pretty well burnt out.

    I have replaced the faulty pair R13 and R14 with 330 ohm 5W resistors, and have done a little bit of aerial bridging to try to support the weakened PCB tracks. The image below shows the result. It is not pretty, but it has returned the amplifier to working, with 22V showing on each of the valve’s Pin 8, and the volume level from each channel being similar.

    My suggestion, use 5W resistors when you’re making this kit, and try to keep enough space around the resistors so that they don’t burn the nearby capacitors and sheathed wiring. In the photo the faulty resistors can be seen too, with the lower leg on the Right resistor almost turned to carbon powder.

    Damage - After repair

    Bagshot Level Crossing – April 2010 – Court Response

    The former State Government of Victoria has been accused of using the sensitive issue of Road Safety to aggressively increase its taxation base by using Road Safety Cameras to raise general revenue. This accusation has previously been leveled by the current State Government and on 31 January 2011 the Deputy Premier said; “Victorians need to have confidence that the state’s traffic camera network is accurate and has proper oversight, which is why the Coalition has requested that the Auditor-General conduct an extensive investigation of speed camera operations and to report his findings to Parliament.”

    For example I believe that the Road Safety Camera at Bagshot, which was installed at a cost of in excess of $900,000, is being used beyond its original remit to control level crossing related offenses to RAISE REVENUE from drivers traveling safely along a piece of open road, containing a level railway crossing.

    Following the level crossing accident in Kerang where 11 lives were lost, there was a public outcry, and an investigation into safety on Victoria’s level crossings was initiated. Following the Parliamentary Inquiry into the accident and into the state of our level crossings, it was determined that a large number of changes were needed. This despite the fact that less than 2% of our state Road Toll occurs on level crossings, and that the general level of safety has improved by over 85% in the 30 years to 1999, taking the annualised toll to under four (4). “This is more than twice the reduction in the Road Toll over the same period”

    One of the changes introduced in 2008 was to introduce a blanket speed limit of 80km/h on all sealed (but strangely not unsealed) major level crossings. This blanket is imposed irrespective of the lines of sight or Australian Level Crossing Assessment Model (ALCAM) rating applicable to the specific crossing.

    Looking at the picture provided of the Bagshot level crossing, we can see that the environment is open grassland with level road and open sightlines, with no housing or other developments infringing on the crossing area. The crossing has been this way in my memory of over 30 years of travelling to and from Echuca. During all of those years, it has been safe to continue at up to the general speed limit whilst approaching the crossing, or slow down to whatever speed the driver deemed appropriate depending on the conditions at the time.

    So, are we saying that the crossing has suddenly become unsafe?

    To my mind, either a level crossing must be either more-or-less safe, or a level crossing is more-or-less unsafe.

    Let us say that Bagshot crossing IS more-or-less UNSAFE.

    IF the Bagshot crossing IS UNSAFE, it MUST be the duty of the Government and its agents to make it safe.

    According to the Level Crossing Fact Sheet #2, the Government spent $1.8 million dollars on 2 Road Safety Cameras in 2007. One of these cameras was located at Bagshot.

    Does a Road Safety Camera or a reduction in speed contribute to safety when crossing a level crossing? The Government’s own sources don’t think so. From “Towards Zero – A Strategy for Improved Level Crossing Safety in Victoria”, “ATSB research found unintended driver error was the most common cause of collisions and a factor in 46 per cent of crashes. Alcohol and drugs were less of an influence, as was excessive speed.”

    Unintended driver error is the real contributor. The sort of thing that happens when a driver is forced to concentrate on several simultaneous activities at once, such as closely monitoring their speedometer, with attention inside their vehicle because they know there is a speed camera is imminent, whilst at the same time their eyes should be looking outside for warning lights, and casting up and down the train tracks looking for approaching trains.

    So, IF Bagshot IS UNSAFE, what is the best way to make it safe? Well the Parliamentary Road Safety Road Safety Committee inquiry is clear that: “While detailed research is limited, the most effective treatments appear to be those that either eliminate the crossing through grade separation,.., or those which provide some physical restrictions such as boom barriers.”

    But surely it must be too expensive to make Bagshot safe through the installation of boom barriers? Well no, as VicTrack announced in October 2010 that the $1.59M project to upgrade three Shepparton and Congupna level crossings (the crossings will now feature boom barriers, in addition to the existing flashing lights) is now complete.

    Then with about $540,000 required for a set of boom gates the Victorian Government could have made Bagshot significantly safer. Yet, the Victorian Government chose not to make it safer, but rather to spend nearly double that amount (being $900,000) to install a Road Safety Camera at Bagshot. A cynical person could infer that boom gates, whilst being a primary level crossing safety mechanism, don’t produce general revenue.

    But now, if Bagshot was safe, and is still in fact more-or-less SAFE

    If the Bagshot levlel crossing is more-or-less safe, and scores too low on its ALCAM rating to justify any further immediate expenditures to significantly reduce the risk of catastrophic incidents occurring, then it must truly be asked, why the previous Victorian Government saw fit to spend $900,000 on this Road Safety Camera at a safe level crossing, when there are 2,267 level crossings in Victoria, and at the current rate of expenditures only 50 to 90 UNSAFE level crossings are able to be upgraded per year.

    A cynical person could then further infer that, as the real risk of a catastrophic incident on a level crossing is already statistically extremely low, based on the Government’s own figures, that money spent on non revenue returning safety improvements at level crossings brings no general benefit, but that investing in a Road Safety Camera does produce general revenue.

    In conclusion, I submit that I was photographed traveling at 99km/h when crossing the level crossing at Bagshot. I further admit that I was not concentrating on my speed at the time, as my attention was fully occupied scanning the railway tracks ensuring that I avoided the twice daily Echuca train.

    The floods have badly affected the people of Victoria’s North. Rather than contributing a fine to general revenue, if required, I would be happy to contribute a similar donation to an aid agency of your choice. Thank you for listening.

    Update

    On 24th February 2011 this matter was heard at Bendigo Magistrate’s Court.

    The Magistrate, whilst not willing to enter into a debate on the merits or otherwise of Road Safety Cameras, saw my point of view. She released me on my undertaking to donate a sum equivalent to the fine to the Flood Victims in Victoria.

    Following the Hearing, the Prosecuting Police officer approached me. He apologised for “speed cameras” and said he “wished that they didn’t stamp ‘Police’ on the Infringement Notices, as is really nothing to do with them”.

    Using this mechanism, I achieved the result of costing the public purse the salaries of the Magistrate, Prosecuting Police Officer, court officials, and court room time. Plus, the State did not get the General Revenue that would have been
    sucked into the machine.

    Generally, more people should object to Road Safety Camera Infringement Notices. The Magistrates won’t increase the fine over the Infringement Notice, nor will they reduce it. But, you have negated any revenue benefit to the State Government. If they lose the revenue, they will stop seeing speed cameras as easy revenue sources.

    Oh, and by the way, a donation is Income Tax Deductible too, for what that is worth.

    Footnote

    If I’m ever feeling depressed about work, family, or life in general. I will go and sit in the Magistrate’s Court for a day. People attending that court generally have REAL issues, with alcohol, money, family, and a place to live. Which just makes me realise, I have nothing to complain about.

    Links

    http://www.premier.vic.gov.au/html/310111_001.html

    http://www.transport.vic.gov.au/Doi/Internet/transport.nsf/AllDocs/8EE1EDA7067A3EE1CA2571AF0005EEFC?OpenDocument

    https://www.victrack.com.au/statewide-projects/category/improving-safety/shepparton-level-crossing-upgrades

    http://www.mainroads.wa.gov.au/UnderstandingRoads/Rail/Pages/Rail.aspx

    Wigglesworth, Graham & Routley: Rail Related Fatal Accidents in Victoria Australia: 1990 – 2002.


    Our NBN is an engineering Fail

    Our NBN is, from an engineering point of view, a White Elephant and is a total failure. It is a failure because it was conceived by a Unionist and a Diplomat on the back of an in-flight air-sick bag, in order to win a political “pissing contest” with the then CEO of Australia’s largest telecommunications operator. In this process good engineering design was never in sight.

    Since that time in 2007, politicians have so muddied the decision making process that the excellent engineering team hired to realise the NBN dream have been cornered into developing a model and a plan to construct a White Elephant, that will be described as obsolete before it is even half way through its 30 year business case.

    This is a rant, and as such I am taking liberties with details and I am summarising my arguments. You don’t want to read an unabridged version. What I want is to record here are my predictions for what will become of our NBN and, if possible, propose alternative directions that could redirect the work of the NBN Co team into a better outcome.

    I must also point out that this rant is entirely my own rant, and is not paid for by anyone, and doesn’t represent the thoughts of my employer, my wife, or anyone else who gives a damn about me. However, this rant is for sale. Based on the extent of my experience, vs. those involved in completing the McKinsey NBN document (valued at $53million), I value the recommendations contained within this rant at about $5 million. This rant is copyright to me.

    I am an engineer. I always write this on my landing card when I come back to Australia. I could write: entrepreneur, consultant, salesman, analyst, at various times, but I don’t. I’m proud of my engineering skills and heritage. This is an engineering view.

    The Big Picture

    Engineers are often accused of over simplifying the world. A few minutes watching the TV show “The Big Bang Theory” shows the prejudice meted out by the scientific community to the one engineer represented. Part of our engineering mentality is the simplification of problems to what we call “first order” variables. These are the issues, the variables, that have the ability to significantly change a situation, or a problem, and are always addressed first by an engineering team.

    Some time ago, I was involved in a futurists briefing forum on the directions for broadband networking in Australia. I remember a speaker, from our CSIRO, being asked about his concerns about the growth of Australia over the next 50 years. First order stuff; things that can make, or break, this country. Not surprisingly a ubiquitous broadband network did not enter into his answer.

    Australia in 2050 will have almost 10 million more inhabitants than it does today. Where are these people going to live? How will they have enough water to drink? How will we generate enough energy to provide all of us with a sustainable lifestyle? These are the kinds of big picture questions that a far sighted politician should be considering on our behalf. Guaranteeing that we all have access to 100Mb/s by 2021 is definitely a second or third order variable in the big picture, and is barely worth considering. Having ubiquitous broadband is irrelevant if we are living with permanent crippling water shortages, and don’t have sufficient energy to light our homes and businesses, and travel as we need and desire.

    The population growth targeted for Australia will require us to build 20 cities with the population of Canberra within the next 50 years. Or, as a worse solution in my opinion, we will need to more than double the size of Melbourne and Sydney, making them even more unsustainable and unpleasant than they are today. Either way, we need to make significant investment into our water resources, and into our energy generation to ensure that we are not all forced to compromise our beloved Australian lifestyle.

    Prediction: By 2025, the decision to invest $50 billion into the NBN will be seen to have been a squandering of taxpayers’ money, as the mandated ubiquitous services provided by NBN Co will have been made obsolete by alternatives offered to most customers by commercial operations.

    Proposal: Choose to develop five NEW sustainable smart cities, each a “Lucky City”, distributed throughout the Lucky Country, one in each State nearly, with focus of ensuring water, energy, transport, hospitals, schools, port facilities, and business relevance are properly designed. Allocate a budget of $10 billion to each Lucky City. The goal for each Lucky City should be to attract a permanent population of 1 million residents by 2030. That leaves us with 20 years to develop 5 further second generation Lucky Cities, before 2050.

    But, we are building the NBN. It seems that the decision to spend our money is unfortunately irreversible. So if we’re going to ignore the big picture, and concentrate on a rearrangement of the deck chairs, then we can at least try to get that done so that they’re all lined up nicely, as we plough onwards into the darkness of the unimagined and unplanned big picture future.

    Technology Decisions

    The engineering team behind the NBN Co have had to deal with seemingly irreconcilable issues with regard to technology choices. They have been asked to build a system that can be built today in a very cost effective manner, and yet still be viable in 30 or 50 years time as is needed to make the business case at least minimally palatable.

    Some time ago, when telephones were state of the art, people had to make decisions on how to roll out the newly designed twisted pair cables. In the very early days of telephony, mainly in the United States, the cost of long runs of overhead (open air) twisted pair was significant and prohibitive, so entrepreneurial engineers invented the “party line” telephone service.

    The party line shared one telephone cable amongst several telephone subscribers, allowing all of these subscribers access to a telephone, with the limited drawback that only one subscriber could use the phone at a time (others could listen in on conversations too, if they raised their receivers carefully, which contributed significantly to neighbourhood watch efforts), and additionally that the “ring tone” was used to identify who should answer an incoming call. Hindsight has shown this option to be incredibly limiting for the subscribers impacted, although it was hailed at the time. The party line may have been the first practical Time Divison Multiplex (TDM) system.

    Many years later, Telecom Australia attempted to solve a similar problem, a limitation in the number of twisted pairs available in the access network, using a technology called RIM, which enabled many telephone subscribers to share one twisted pair. Whilst this technology, developed by Alcatel if I remember correctly, was hailed at the time, hindsight has shown it to be incredibly limiting for the subscribers impacted and upon the delivery of modern broadband services. I believe the RIM system was based on Pulse Code Modulation, also a kind of TDM.

    Now we are considering the roll out of an expensive optical access network, which will reach ubiquity throughout our nation, and we seem to be repeating the mistakes
    of the “party line” and the RIM services, through the use of a shared optical network technology called PON, and more specifically GPON. GPON uses passive optical splitters to share the TDM capacity on one fibre between up to 64 customers.

    PON, or Passive Optical Network, was invented by scientists in the early 1990s as a way to reduce the cost of rolling out optical fibre access networks, by reducing the cost of the optical fibre by sharing the fibre, or equivalently its capacity. In early 1990s optical fibre was relatively new, and was quite expensive. In 2010, and over the next 30 years of the NBN Co business case, the cost of optical fibre will continue to fall, and has already become an insignificant part of the total construction cost equation.

    Already today, it is believed that the cost of rolling out a “home run” optical access network, is less than 10% more than a PON access network. A home run network is built on the same architecture as today’s copper access network, and every customer gets their own fibre.

    Prediction: By 2025 the decision to build PON based access networks will be questioned by customers who’s access to holographic video services, for example, is curtailed by their neighbours sharing their bandwidth, NBN Co will be forced to revisit their obsolete PON builds and re-open the streets to add more home run fibre.

    Proposal: Redesign the proposed NBN Co roll out to implement a home run fibre construction plan. Centralised GPON or other technologies can then be used by Retail Service Providers, and as each customer has their own fibre, RSPs will have access to Layer 1 and can make their own technology decisions.

    Footprint & Roll out Decisions

    The NBN Co has been put into a trap by the political process of mandating the ubiquity and equality of services to 93% of Australians. Simply put, it is not economically viable to provide the same services to all. Nor do all want to purchase an identical level of service at this time, or at any time in the future.

    So, the NBN Co has to start building now in the easiest locations, to allow the managers to achieve their Key Performance Indicator targets, which are sure to be in terms of homes passed per month, and lock in their personal bonus payments. That is, the major building works will be undertaken in cities where passing the most homes is the easiest, but unfortunately the NBN Co fibre is least needed. And simultaneously NBN Co must also build in marginal country seats where the politicians need to secure votes to remain in office. Needing to build everywhere, and all at once, will cause significant labour shortages, and will probably cause the single vendors of technology to experience shortages in supply.

    Prediction: Reaching 8,000 homes passed per day will result in significant excess costs that were not included as part of the NBN Co business case (though they were was identified as a serious risk).

    So, why are we overbuilding our inner-city areas with telecoms infrastructure again? Our city streets were overbuilt by Telecom Australia and Optus in the 1990s with HFC to deliver broadband, television, and voice services. Over 2 million home have access to HFC networks installed in Melbourne, Sydney, Brisbane, and Perth by one or both of these two companies. Surely, we can reuse this technology in our NBN? But no, our politicians tell us that HFC is obsolete. But, what would they know?

    Prediction: Those predicting the obsolescence of Hybrid Fibre Coax technology will be retired and most probably in their graves before this eventuates.

    HFC, or Hybrid Fibre Coax, is a technology based on an optimum hybrid of coaxial cable and optical fibre, blending both Frequency Division Multiplex (FDM) and TDM technologies. There is only one reason why HFC might become obsolete, and it has nothing to do with technology.

    HFC is used by cable TV operators (called MSOs) in United States and throughout Europe. In both of these significant markets the MSOs provide a competitive access infrastructure, a facilities based competition against the incumbent telecom operators, and have driven prices down and service quality up throughout their markets. So, as long as these MSO companies exist, and they have an extensive embedded base of HFC networks, then HFC technology will never be obsolete. Given the political drive to maintain and enhance telecommunication facilities based competition in all of the developed world (except Australia), the death of HFC technology is therefore over rated.

    Proposal: Acquire and use the existing Telstra and Optus HFC networks installed throughout our cities as a head-start on the NBN Co build out. This would allow NBN Co to: avoid re-overbuilding sensitive inner-city areas, immediately pass over 2 million or 25% of homes,  immediately provide or maintain 100Mb/s services to any and all customers within the footprint who want these services, and most importantly allow NBN Co to focus on delivering broadband to the bush.

    Proposal: Direct the NBN Co to focus their roll out exclusively into regions where the minimum 12/1 wholesale service offering is currently not obtainable. Only once Australia’s digital “have nots” have been fully provided (within the original 93% mandate) should the NBN Co begin to roll out into existing broadband enabled areas. This will achieve the important mandate for providing for Australia’s digital future, whilst minimising the potential for over investing taxpayer funds and orphaning existing investments.

    Vendor Strategy

    As a young engineers moving from the world of the University on to the work place we are, or were, very impressionable. In our first jobs we learned the ways of our company, and if we were lucky we developed good habits and clear thought processes through being in contact with experts on a daily basis. Over time, years and even decades, these thought processes insidiously change in our minds from being “a way” to do things, to being “the way” to do things.

    When a young impressionable organisation, such as NBN Co, is being lead by two people who jointly have over 4 decades of experience in the way that a particular company does things, then there is every chance that alternative thought processes, which may reach alternative results, will not even be considered, because they are not even within scope of the experience of the leaders. I believe that one only needs to look to the employment history of the CxO organisation of the NBN Co to see this effect in practice.

    Following a year of vendor selection activities by the NBN Co, and in consideration of the above discussion on blinkering of the thought process, it is easy to see that the team have pursued a strategy of risk maximisation at every decision making opportunity. There are two aspects to this. 1. Geographic Focus and 2. Single Vendor. The issue of single vendor I will address in the following section.

    Looking at the vendor roster for the NBN Co, one would believe that our future is intimately bound up in the technological future of Central Europe. Both of the selected major network equipment companies originate from countries that have exchanged title on the same pieces of land now for over 1,000 years. Now, we know that the employment histories of the NBN Co management team is bound up in these companies, but surely there is enough capability within the team to see the risk associated in limiting the technological input into our NBN into one very small piece of the geography of the World.

    The continents of Asia and the Americas have produced a number of significant technology companies, who’s lack of presence on the NBN Co network vendor roster is conspicuous by their absence.

    China and India are now the world’s most rapidly developing nations, and are home to some of the world’s best technology companies. Their engineers have studied in every major University in the World, and have returned to an environment that promotes vigorous and sustained innovation and growth. These companies promote non-European ways of thinking and try to develop their own paths towards solving today’s issues. Specifically, I believe excluding Chinese companies as suppliers to the NBN Co is possibly the biggest mistake that Australia, with our close cultural ties to China, can make.

    Prediction: By 2020, technology developments from within China and India will show the selection of exclusively European network technology vendors for the NBN build as myopic and xenophobic.

    Proposal: The NBN Co should revisit its vendor selection policy to ensure that the technology investment programme of vendor companies is properly considered as an indicator of how their technology legacy will develop over the full 30 years of the NBN Co business case. Preference should be given to vendors who exhibit fully alternative methods of achieving the required results to ensure that real technical diversity is enhanced.

    Vendor Management

    The NBN Co team have worked hard to try to pick winners from the options provided to them by vendors during the tendering processes. However, the process of picking winners is as flawed in the vendor management process as it is at the race track, with the favourite rarely coming in first place.

    Before the Americanisation of Telstra, Telecom Australia always pursued a dual or multi-vendor policy for all major technology purchases. Limiting yourself to the selection of a single vendor may be expedient in the situation that you have to collect a $13 million windfall and get out of town within 3 years. But, in the case of a 30 year business plan there are many opportunities for critical path failures that can simply be avoided by the implementation of a parallel vendor supply policy. One only has to imagine what would happen to the NBN Co build schedule if there were to be another Icelandic volcano eruption halting European air travel and air freight for three months, for example.

    Yet, despite the opportunity to select several, or at least alternate, providers of network technology building blocks, the NBN Co have in every case determined to select a single company as a winner.

    Beyond this, relating to the above point of Technology Decision process, there has been no effort to select equivalent alternative technologies to allow for the outcome that the basic technology selection itself could have been wrong. If there had been, then we would have several vendors for these technologies.

    Prediction: By 2020 one or more of the NBN Co prime sole vendors will be involved in a billion dollar price gouging scandal, and this will be documented through evidence leaked to Wikileaks or an equivalent whistle-blowing web site.

    Prediction: By 2020 one or more of the NBN Co prime technology vendors will fail, and the bankrupt assets will be purchased by Chinese or Indian interests. During the vendor bankruptcy process, the NBN Co build process will be halted for 12 months, until an alternative vendor can be found to replace the bankrupt vendor’s proprietary technology.

    Proposal: The NBN Co should revisit their vendor selection process to ensure that multiple vendors are selected for each technology building block at the initial stage, enabling the technology supply chain to be flexibly managed based on price, performance, and availability of product. Vendors should be selected from different geographies to ensure that force majeure does not delay the NBN Co build schedule.