
In Curb Weight I’ve spoken about dividing the weight between the vehicle and an extreme off-road trailer, and how the vehicle was modified to be able to pull the trailer successfully. In this post I’ll cover how I’ve divided the types of load between the vehicle and trailer, and how I’ve built an equipment rack to support the load being carried by the vehicle.
I must mention that a key requirement for the vehicle build was that any overlanding related modifications had to be entirely reversible, and removable. The rear seat needed to be able to be refitted so that the 2 door Rubicon could carry 4 people if needed. So my equipment rack must easily removable too.
Vehicle Contents
I would like the vehicle to be able to leave the trailer at a “base camp” and still have the required equipment to sustain a day (or in an emergency several days) away from the camp site. This dictates what I need to build into the vehicle, and what I can leave in the trailer.
The vehicle must therefore contain the following items.
- Drinking Water – Potable water either 20 litres or 40 litres depending on the requirements.
- Refrigeration – A 40 litre refrigerator, sufficient to hold frozen or cooled items depending on the length of the passage.
- Power – 12V and 240V AC systems to power the refrigerator, cooking, communications, and tools.
- Food Preparation – using 240V AC induction cooking, kettle, and coffee machine.
- Food – Chilled and dry food sufficient to cover the entire passage.
- Clothing – Warm clothing, sufficient to overnight should needs dictate.
- Communications, and Electronics – Both UHF and satellite communications system for regular and emergency use.
Based on the item lists I’ve prepared the weight of this equipment and stores should be approximately 260kg (including trailer ball weight), and this can be easily carried by the Wrangler JL 2 Door.
Trailer Contents
The Stockman Pod Extreme trailer has a number of well separated spaces, including two drawers and a large tool box, which allow it to safely store lots of smaller items in boxes without too much movement.
The trailer will carry the things that don’t need to go in the vehicle, and either too heavy or too bulky to consider putting in the vehicle.
- Fuel – In Jerry Cans from 40 litres to 200 litres, depending on the length of the passage.
- Water – At least 65 litres of possibly non-potable water, carried in the integrated water tank
- Accommodations – Both a James Baraud Evasion roof top tent, and/or a Terka tent and stretcher bed, providing options for easy overnight or comfortable base camp builds. Also a 3m x 3m gazebo to provide shade and light rain protection as needed.
- Furniture – Folding table and camp chairs.
- Gas Bottles and Food Preparation – Including 2 burner gas stove for food preparation.
- Large Tools and spare parts – To support repair of moderately major items, and maintenance of the vehicle and trailer.
- Recovery Equipment – Larger items stored on the trailer, as most recoveries will involve the trailer and necessary items can be moved into the vehicle if needed.
- Toilet and Hot Water System – To provide hot water for base camp washing and showers, and toilet to provide a bit of camping comfort.
- Clothing – Additional clothing and linen as required.
Basic Equipment Rack Design
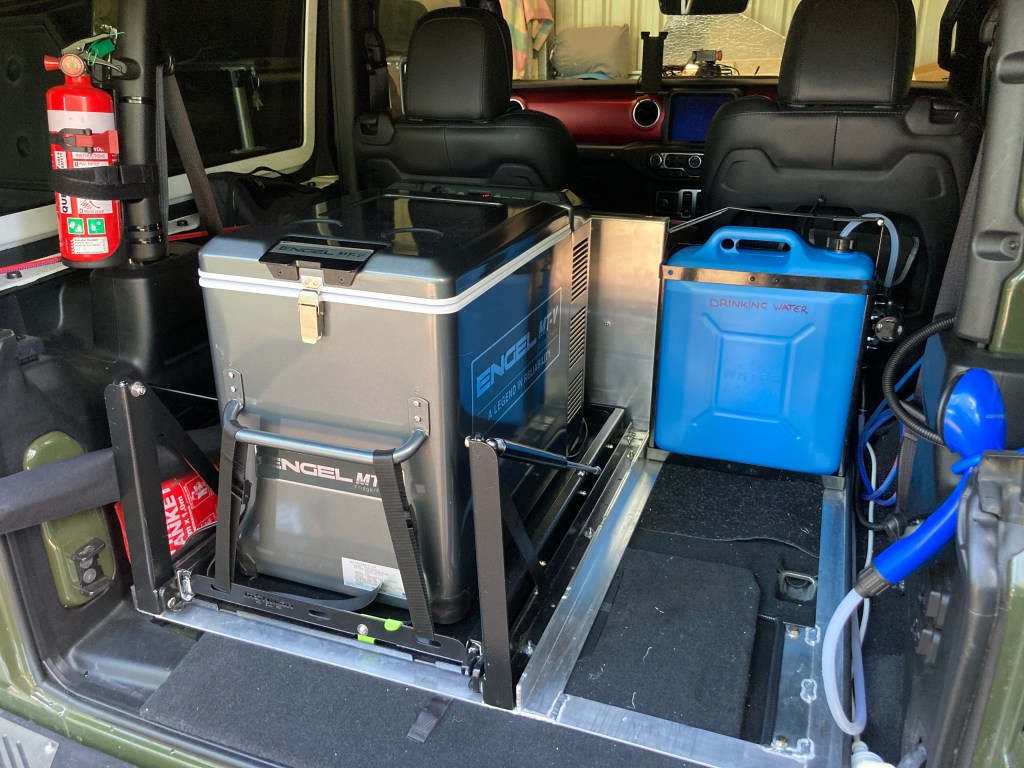
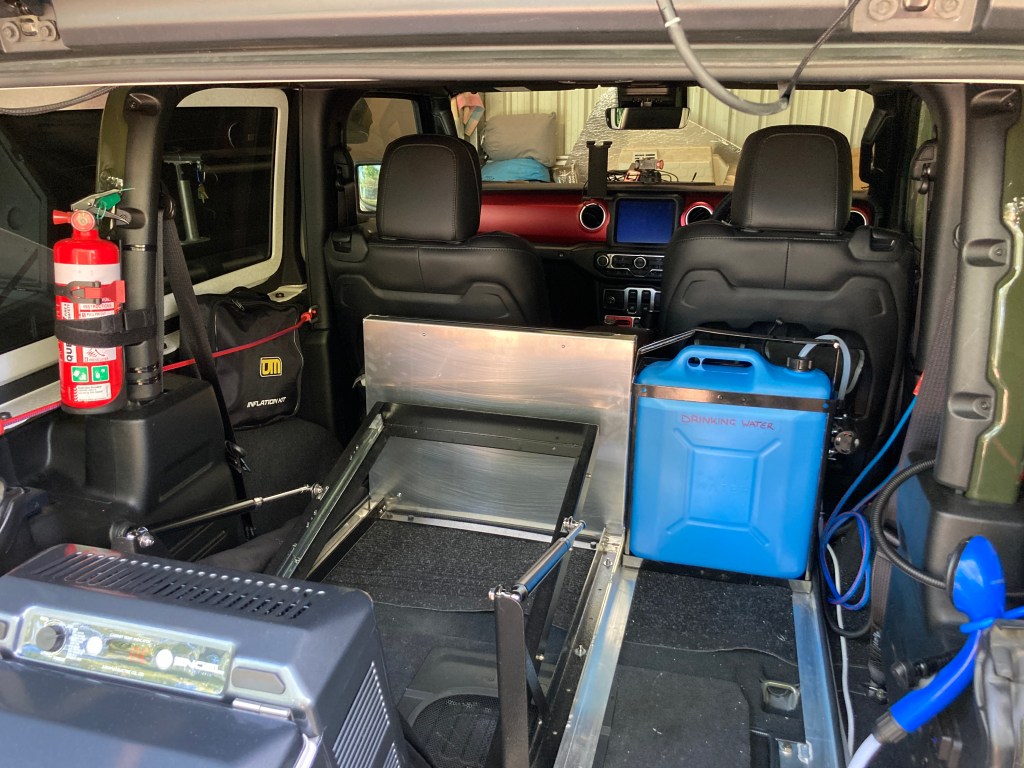
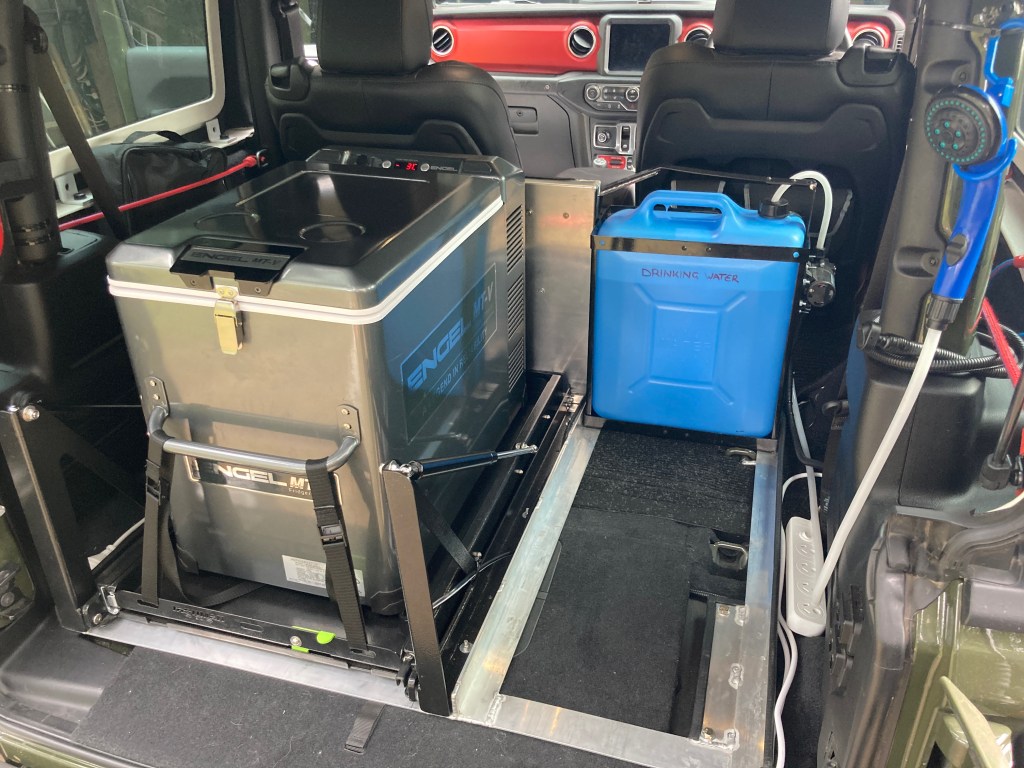
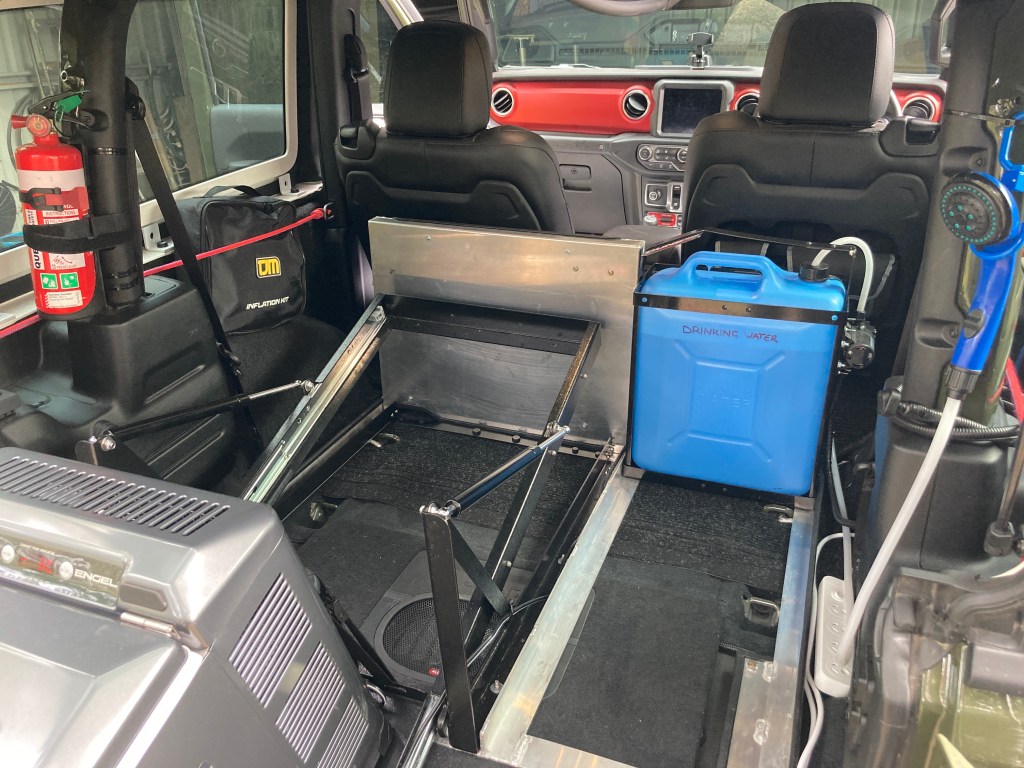
While the design has evolved over the past weeks of the build, it essentially needed to carry 1. refrigeration, 2. electrical systems, 3. water, and 4. stackable food and assorted items. All of this, in a very tight space. Since the Wrangler JL has a swinging tail-gate with a fold down tail-gate table, it made most sense to put the refrigerator on its slide on the left side and the electrical systems in front of it.
On the right side the drinking water would be stored as far forward as possible, and the food and assorted items stored in milk crates which are easily removable and stackable for access. Luckily the width of a Jerry Can is the same width as a milk crate so it was possible to use the same dimension for both.
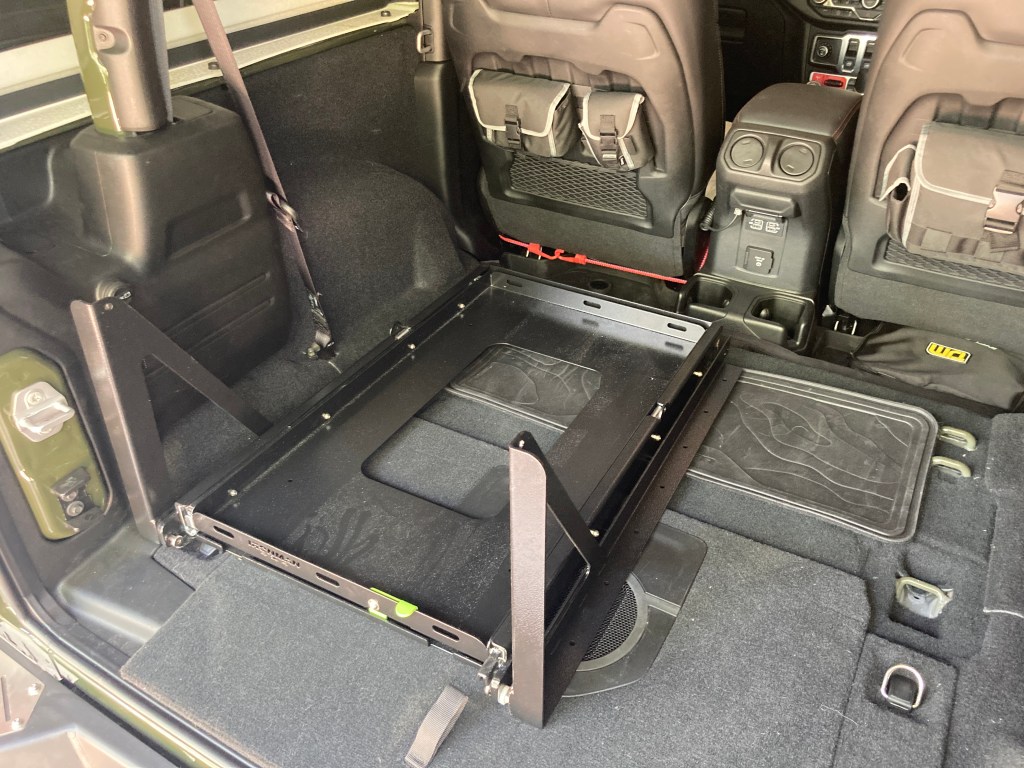
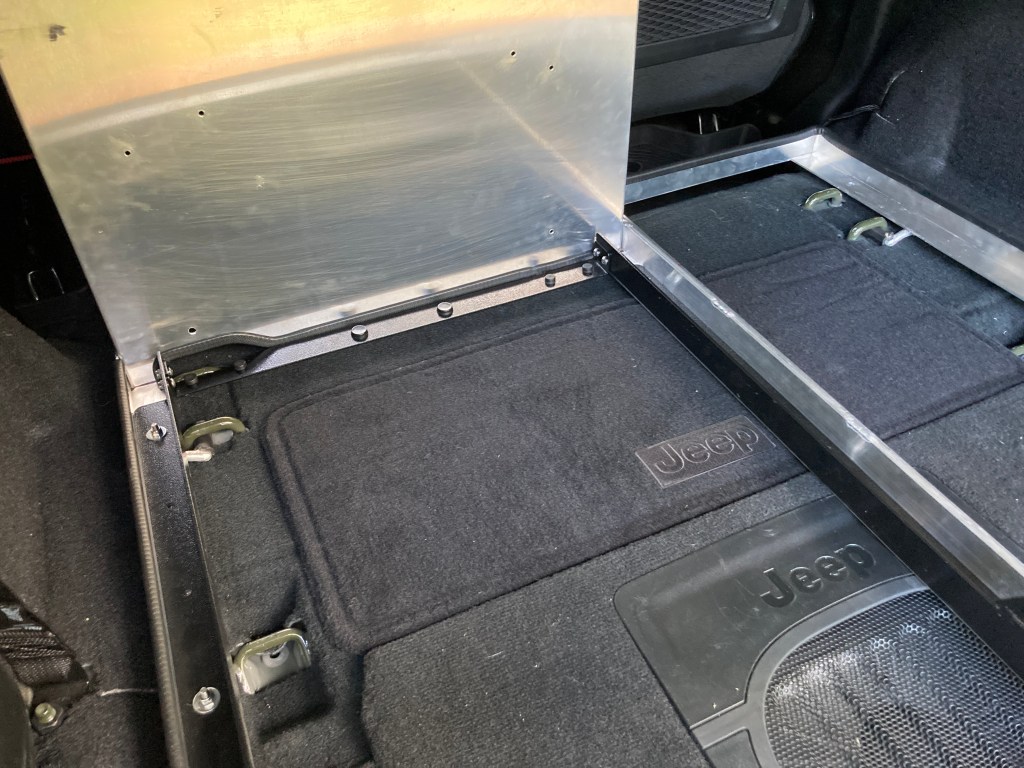
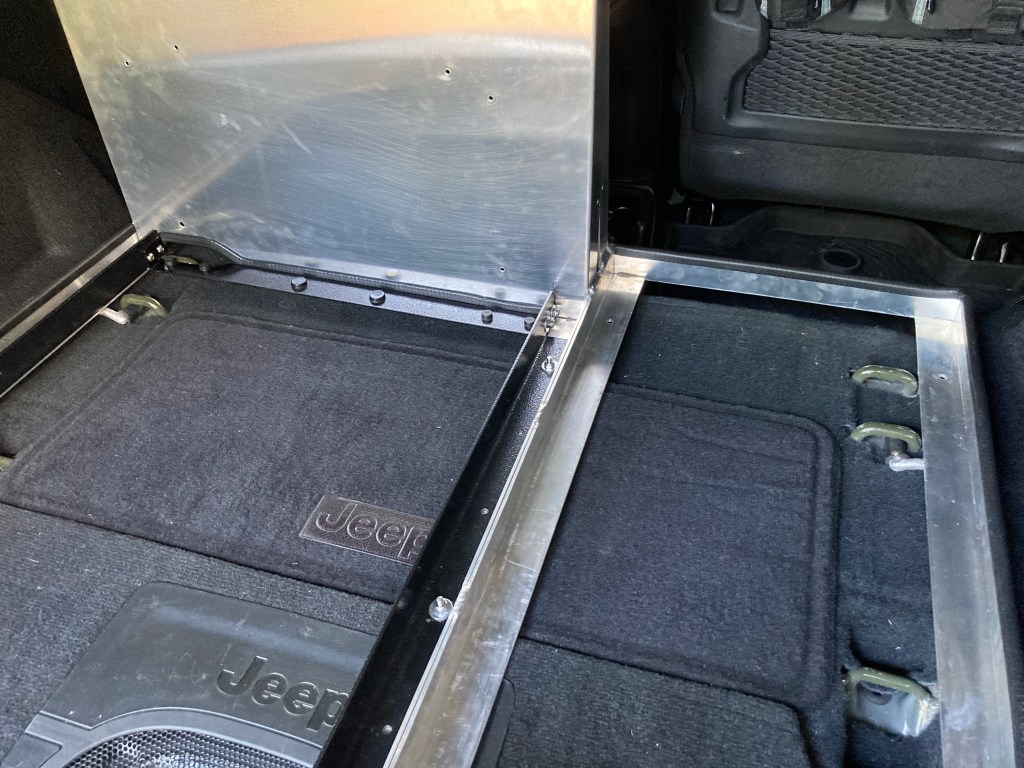
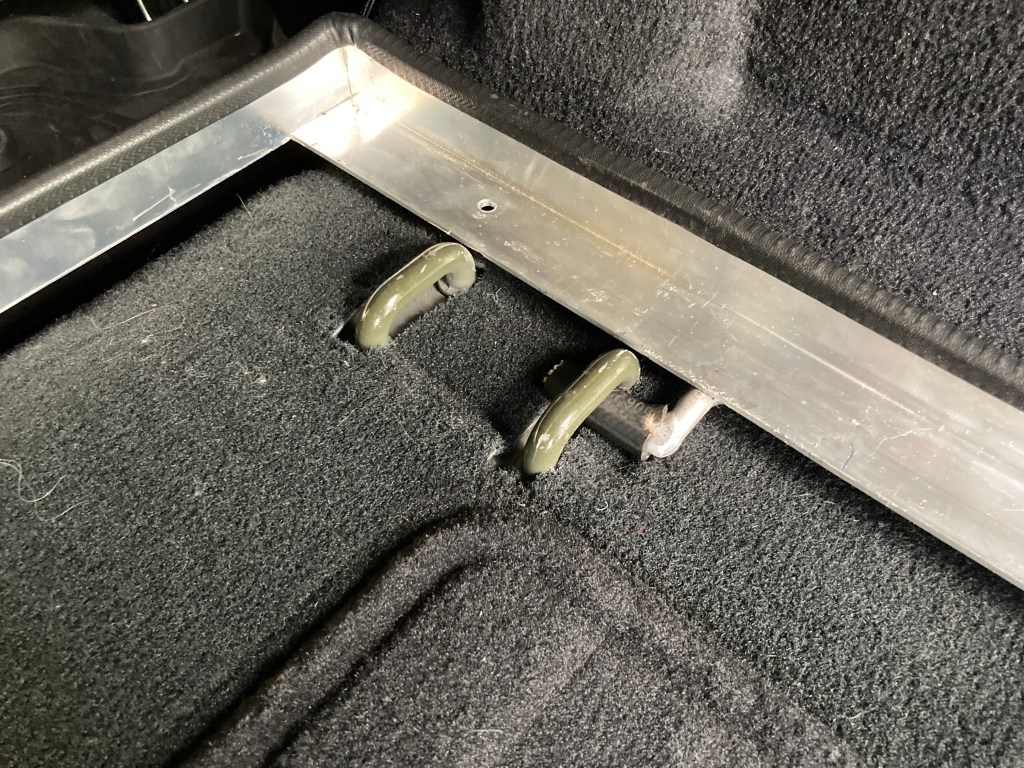
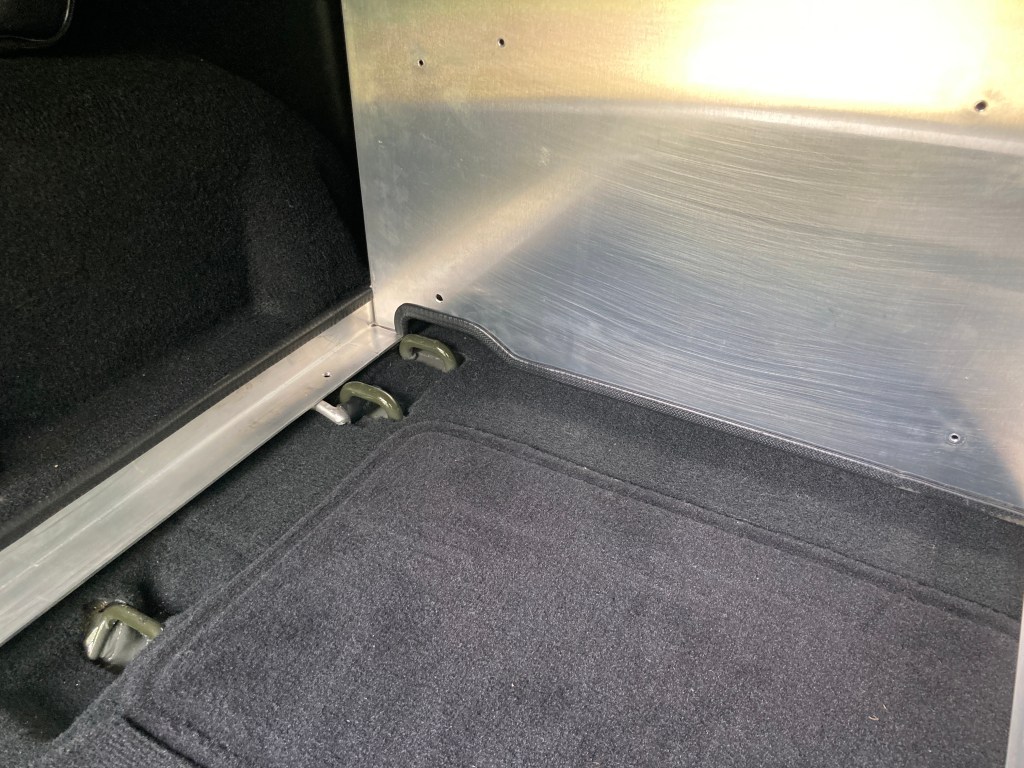
The Wrangler JL 2 Door has a number of tie down options. There are 4 integrated threaded nuts in the rear of the floor, which can be fitted with high-tensile bolts. But these rear bolt locations don’t control the front of the space effectively. Fortunately there are also strong loops in the forward floor, to mount the rear seat, which can be used to secure the load at the front.
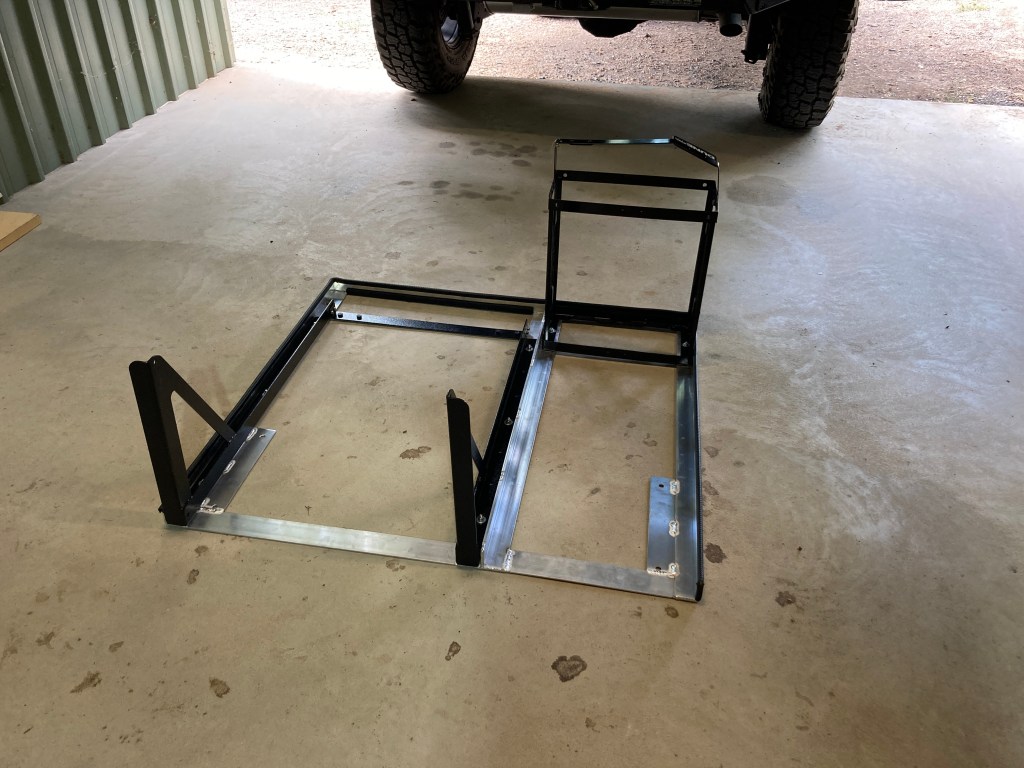
Build Process
This was a custom build, so it was sensible to build in stages so that I could change things if the equipment rack didn’t perform as anticipated. The stages below were each separated by a shake down trip, and the improvements noted through use were incorporated into the following stage.
Stage 1 – Fridge Slide & Jerry Can (Water)
The first stage was securing the fridge and water in a Jerry Can. These two item could then be used to locate and tie down the other items
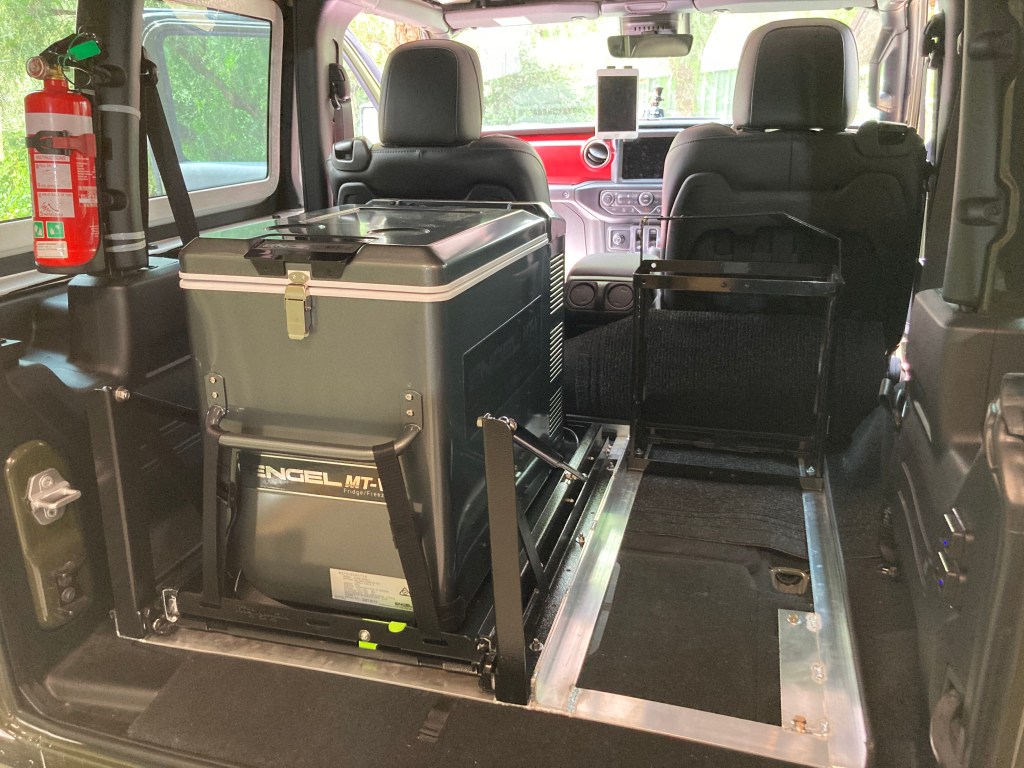
So this first stage worked well. I’d note that the tilting fridge slide was unnecessary, and a standard (non-tilting) slide would have been smaller, cheaper, and weigh less. I’ve also found that the tilt makes it difficult to store things in the fridge as when tilted things can’t be removed without the stacks of items in the fridge falling over.
I also found that the water in the Jerry Can was unusable, as the full Can is too heavy to remove for use, so it was necessary to use a water pump to deliver the water to the food preparation area at the rear of the vehicle.
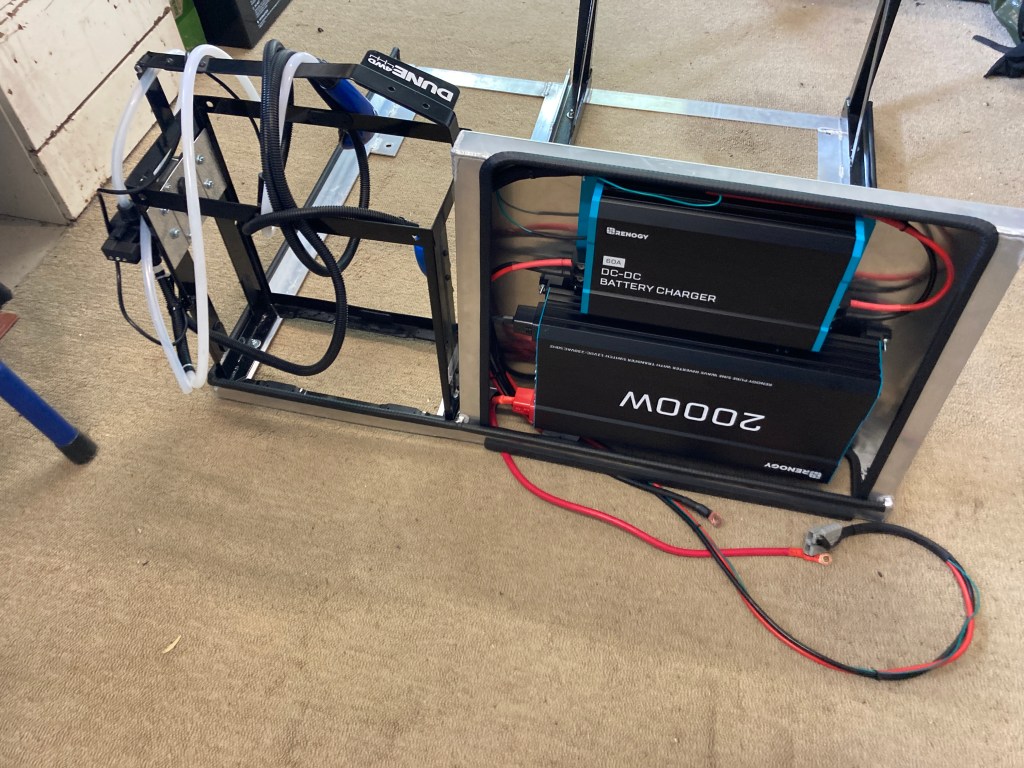
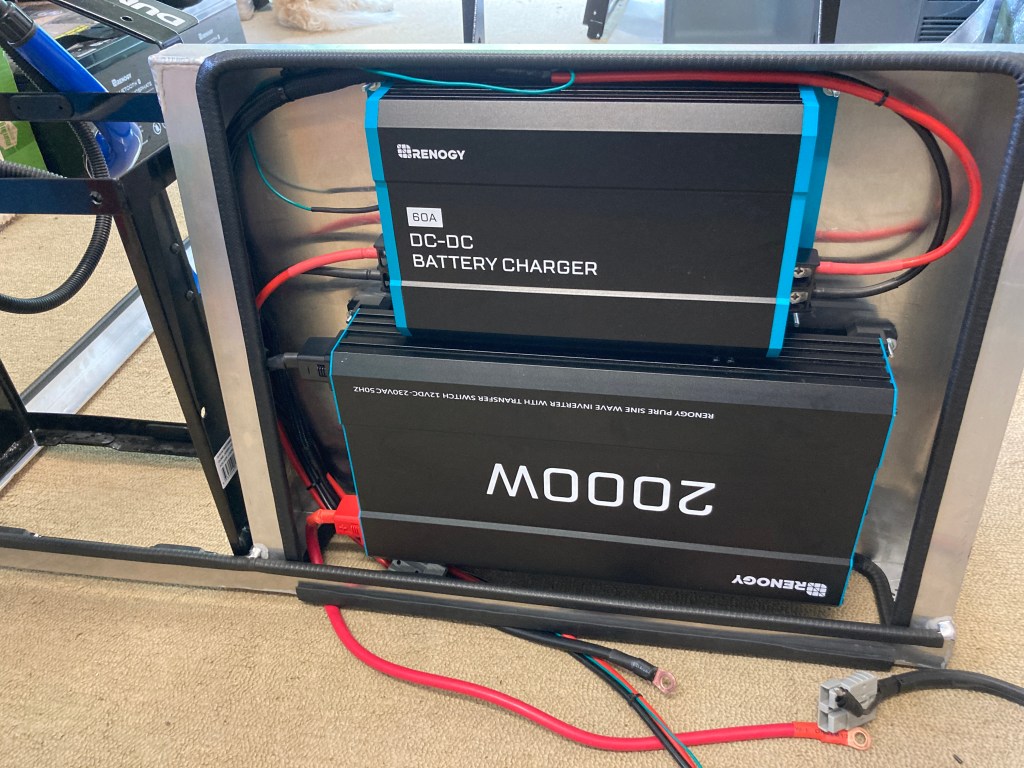
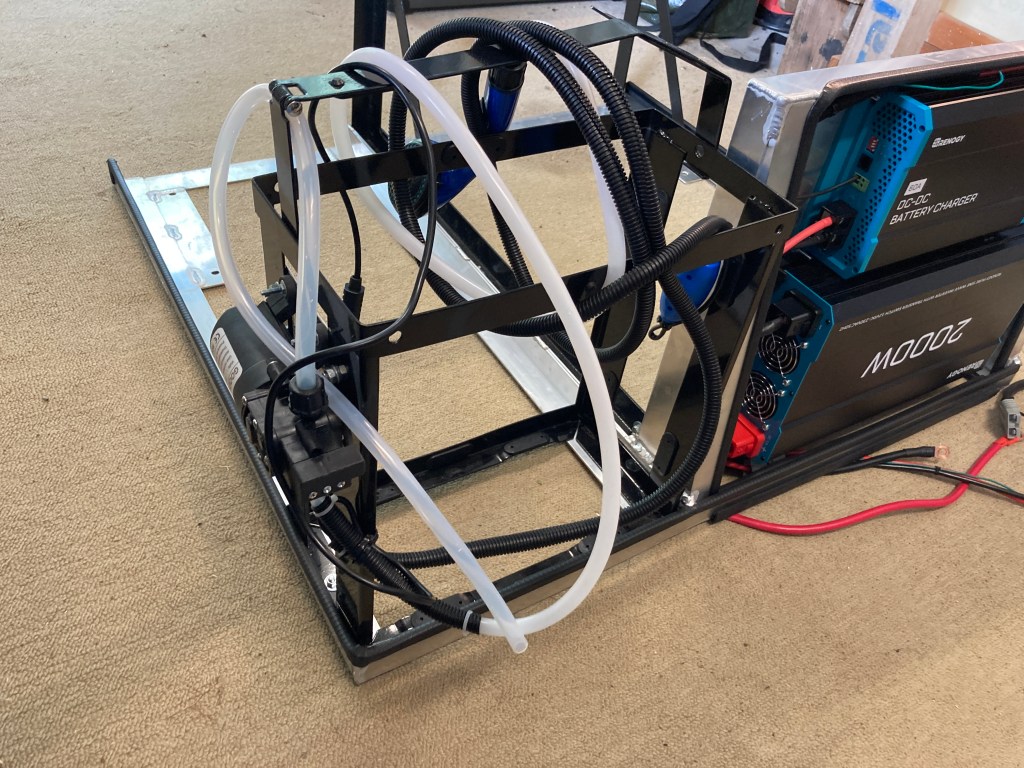
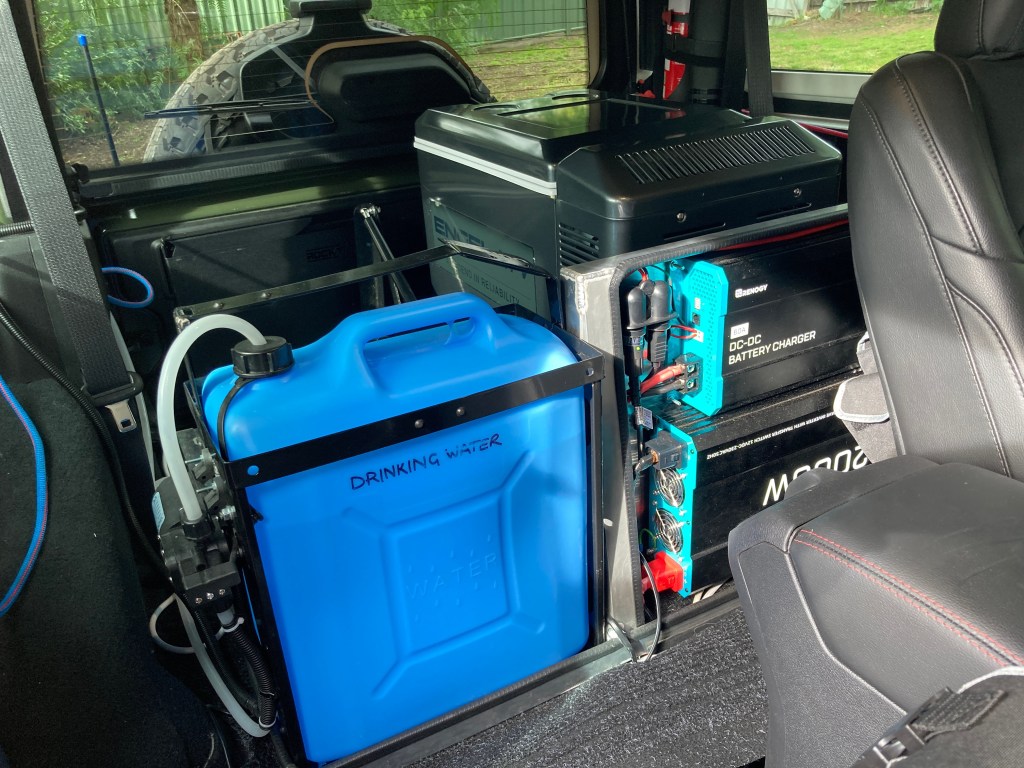
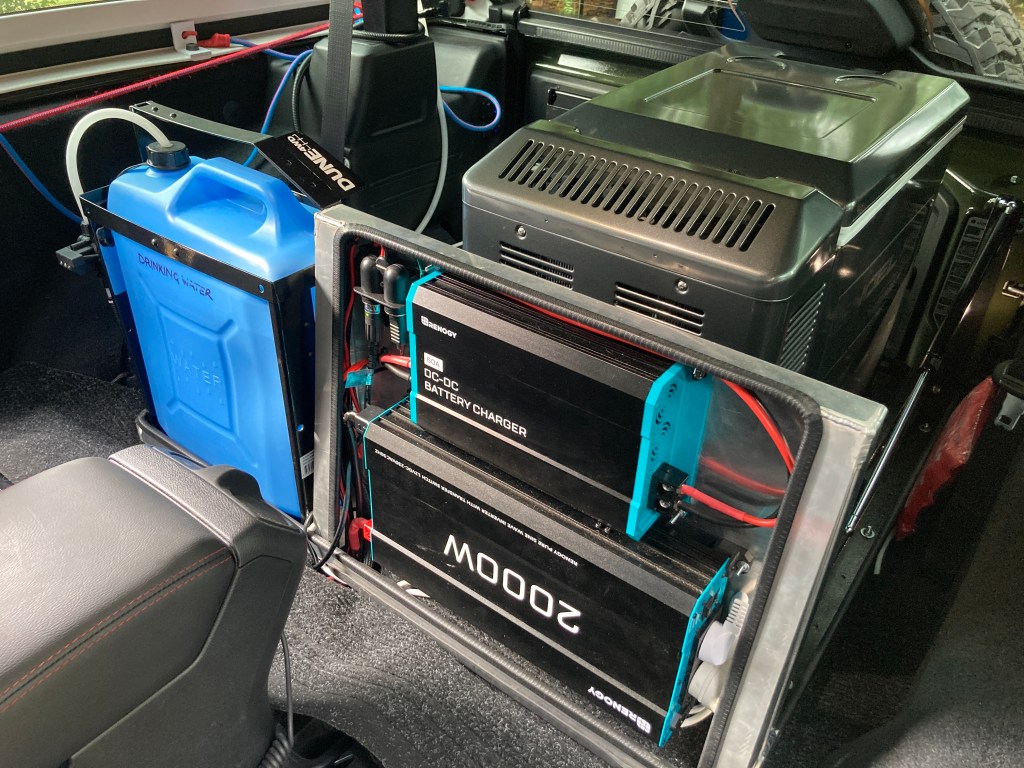
Stage 2 – Electrical Panel & Water Pump
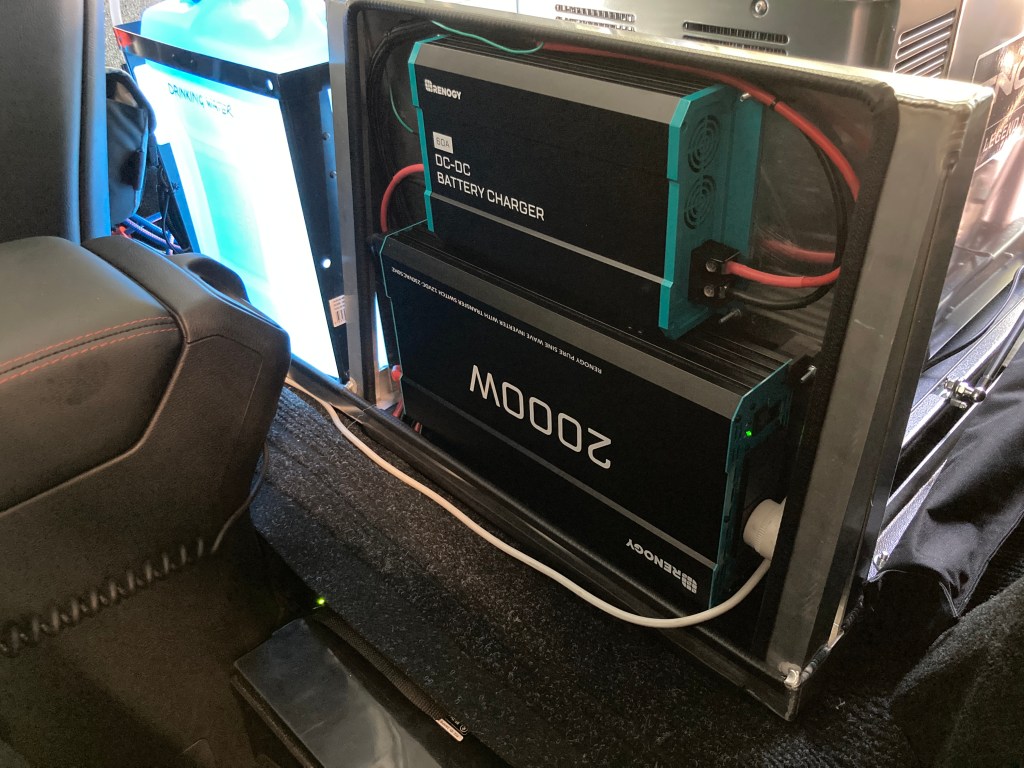
The next stage was to securely mount a Renogy 60A DC-DC charger along with a Renogy 240V 2kW inverter system into an electrical panel. The electrical panel was built onto the front of the fridge slide, and it helped to substantially strengthen and stabilise the equipment rack.
The battery charger 12V wiring is done with 6AWG cables and they do heat up during usage. The inverter 12V supply wiring is done with 0AWG cables.
Noting that the two Renogy Lithium 100Ah batteries are secured by pressing them between the front seats and the rear foot well. The end of the slide protrudes over the foot well too so the batteries are unable to move, yet they don’t require special mountings.
I attempted to use a Coleman Camp Shower to deliver the drinking water, but the submersible pump was too large to go into any available water grade Jerry Can. The answer was to cannibalise the Coleman Shower, used together with a 6 litre/min 12V pump, which works perfectly. The retention device in the cap has a hole exactly the diameter of the shower hose, so it can be inserted into the top of the Jerry Can with no leaks.

Following the second shake down all of the systems were proven to work as expected, so the final fitting and build could be completed.
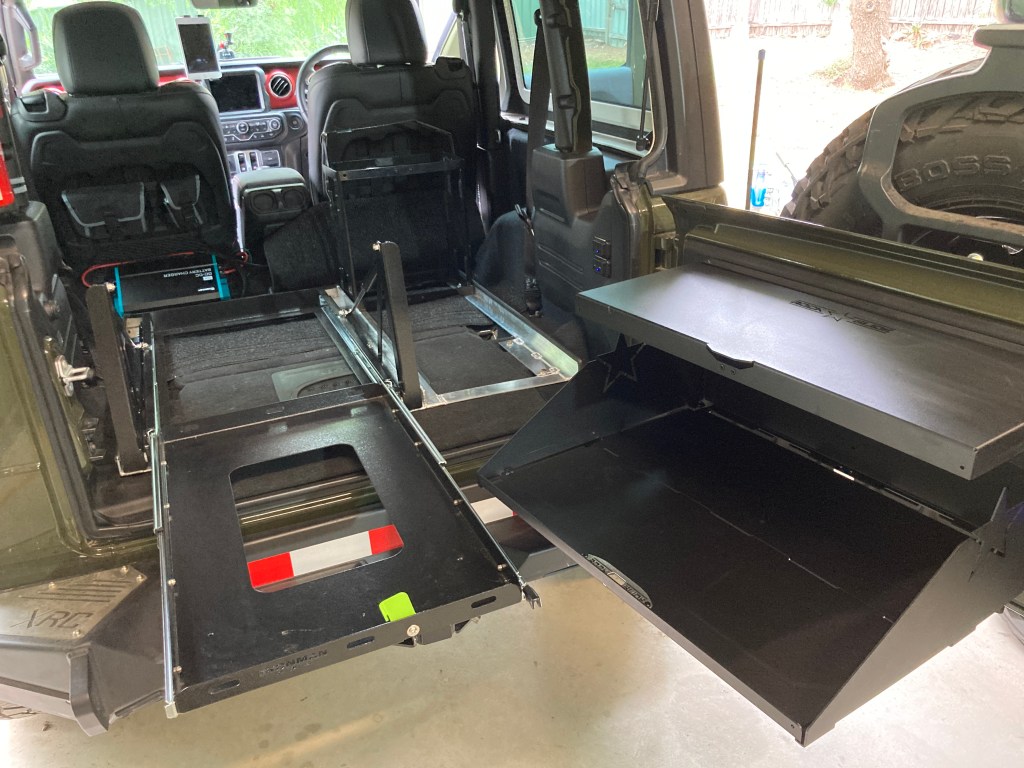
Stage 3 – Final Fitting & Milk Crates
At this point the final build was to add hooks to the rack to insert into the seat loops at the front to retain the equipment rack in the event of a roll-over or other eventuality. Although the prior shake down showed that the equipment rack remains stable despite extensive horizontal and vertical shaking and even several airborne excursions.
The frame is sized to allow two milk crates to be placed one behind another, with 20 litres of water, giving a total capacity of 4 crates below the window line of the vehicle. Where 40 litres of water is required for a passage, it will be necessary to stack up 3 crates, which will affect rear visibility but otherwise this is a useful option. As a maximum up to 6 crates can be stacked and restrained in the rear of the vehicle.


The System In Use
The initial usage in two shake down trips shows that the build has been successful. Water, power, and food are all easily reached and used to safely prepare meals.
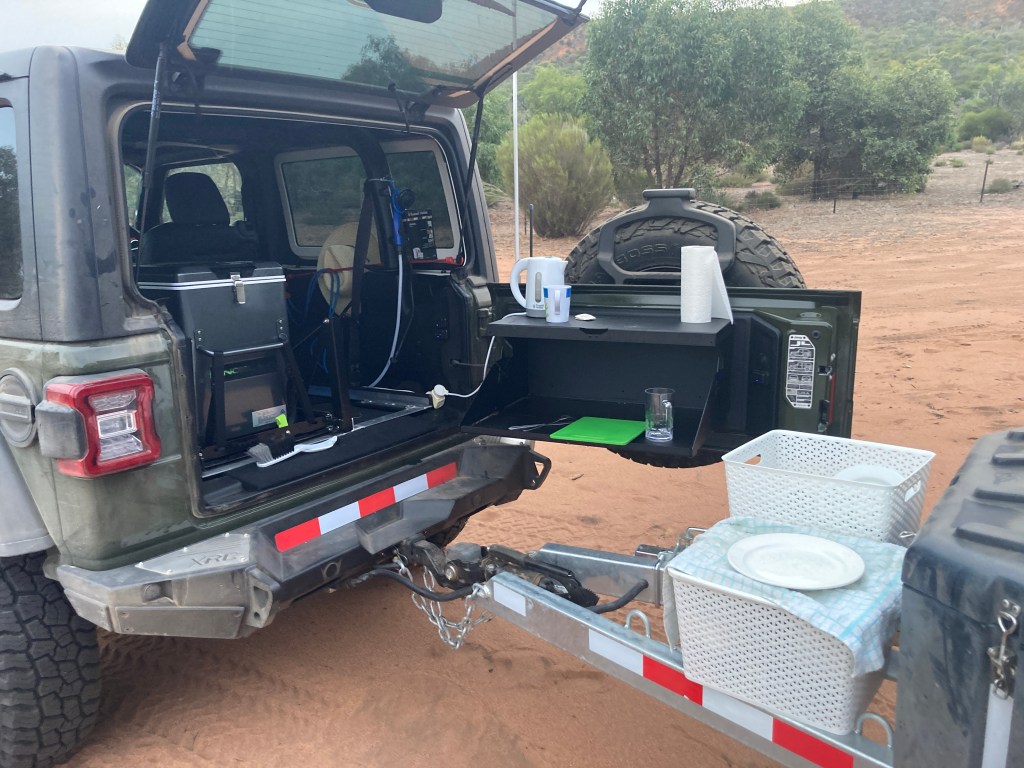
The trailer has furniture, gas cooker, and hot water systems which will allow longer base-camping to be done comfortably and conveniently, but the above overnight food preparation system is doing what it should.
