This post is a bit of a mixed bag, describing some software and hardware integration, together with some raving about a great tool I’ve been using. So, let’s get started.
Platform
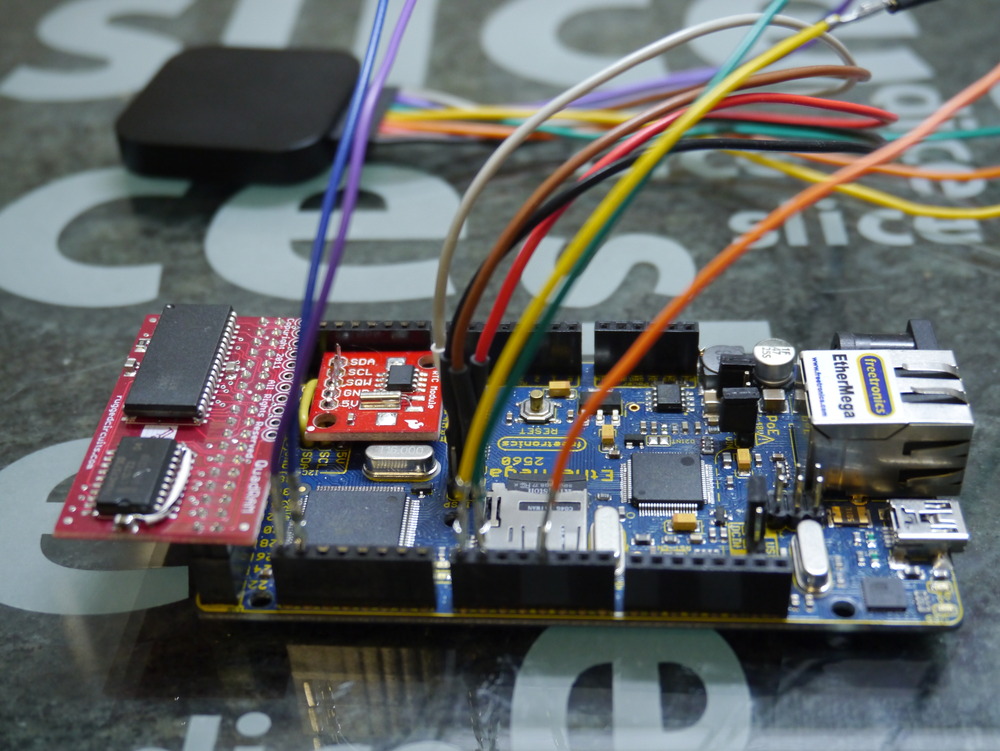
Some time ago I got a Freetronics EtherMega, which is essentially an Arduino Mega2560 with an integrated Wiznet W5100 Ethernet interface, and a MicroSD card cage. I’ve introduced this product and the use of freeRTOS here.
EtherMega (Arduino Mega 2560) and freeRTOS
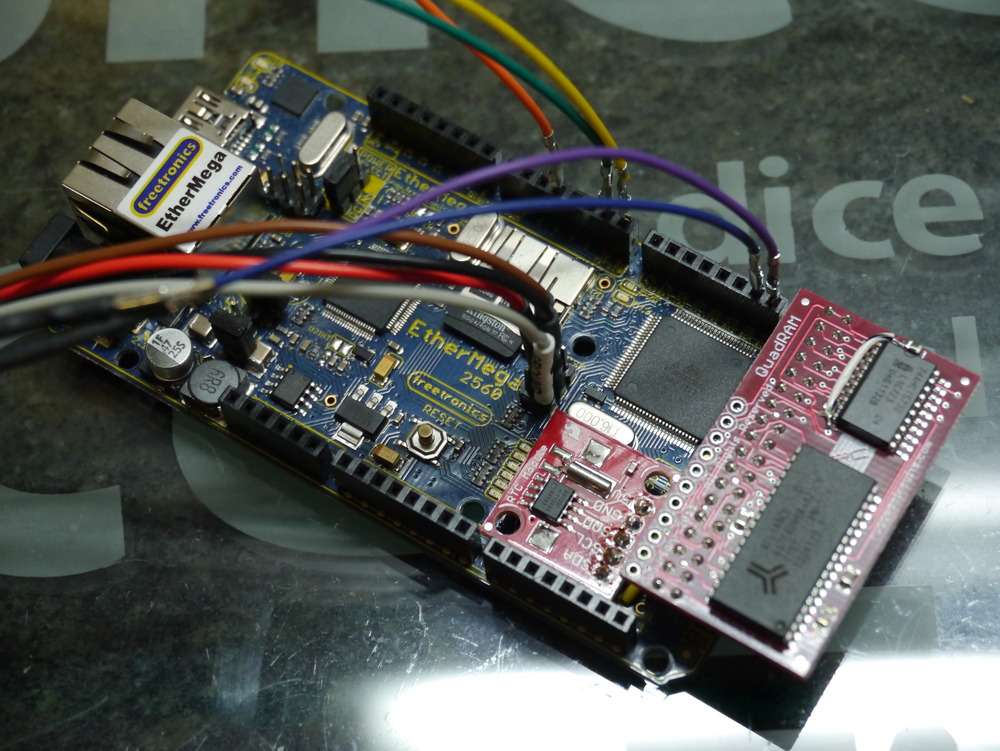
One great thing about the ATmega2560 used in the EtherMega, and the Arduino Mega2560, is the availability of an external memory bus. I’ve been using a Rugged Circuits QuadRAM, and now have ordered three more of their MegaRAM devices, and intend to make the ATmega2560 my standard platform. Why three? Well everyone knows that good things come in threes.
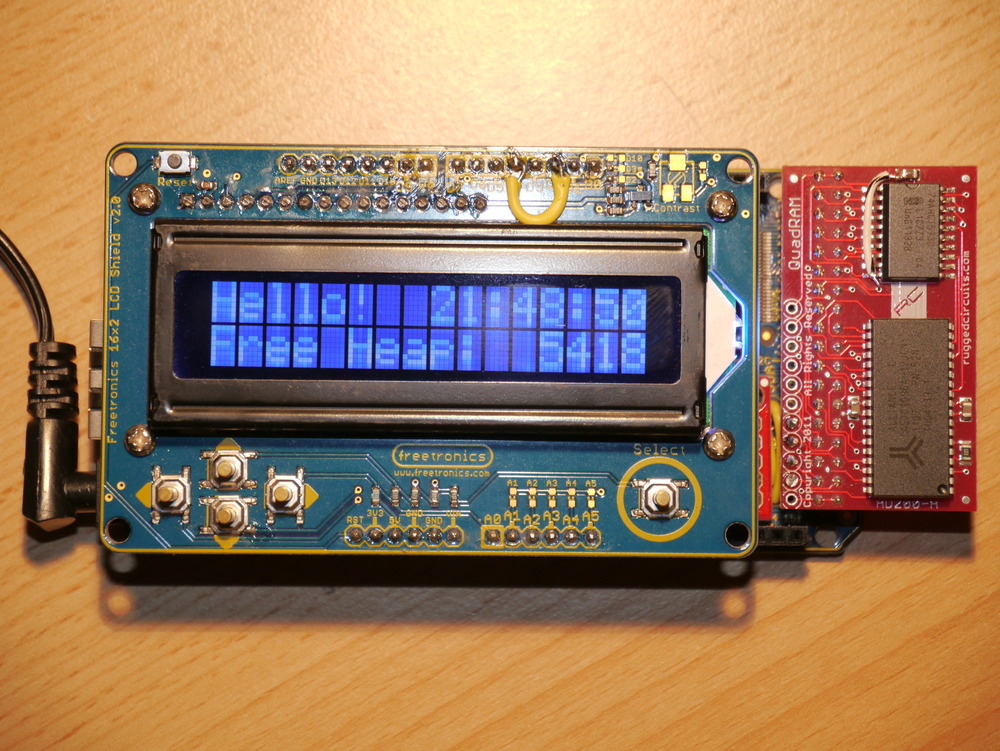
QuadRAM (512kByte) on Freetronics EtherMega (Arduino) ATmega2560 with freeRTOS
I’m actually preferring the Rugged Circuits MegaRAM which has only 128kBytes of RAM, so it won’t be as flexible for bank switching as its big brother. Also its chip select line is reversed (note to self to fix this in the driver). But, simply having 64kBytes of normal extended RAM plus another 56kBytes of special purpose (bank switched) RAM seems like it wil be sufficient for the duration. I’ve bought a couple to go on some Android ADK devices, that I’ll write about soon.
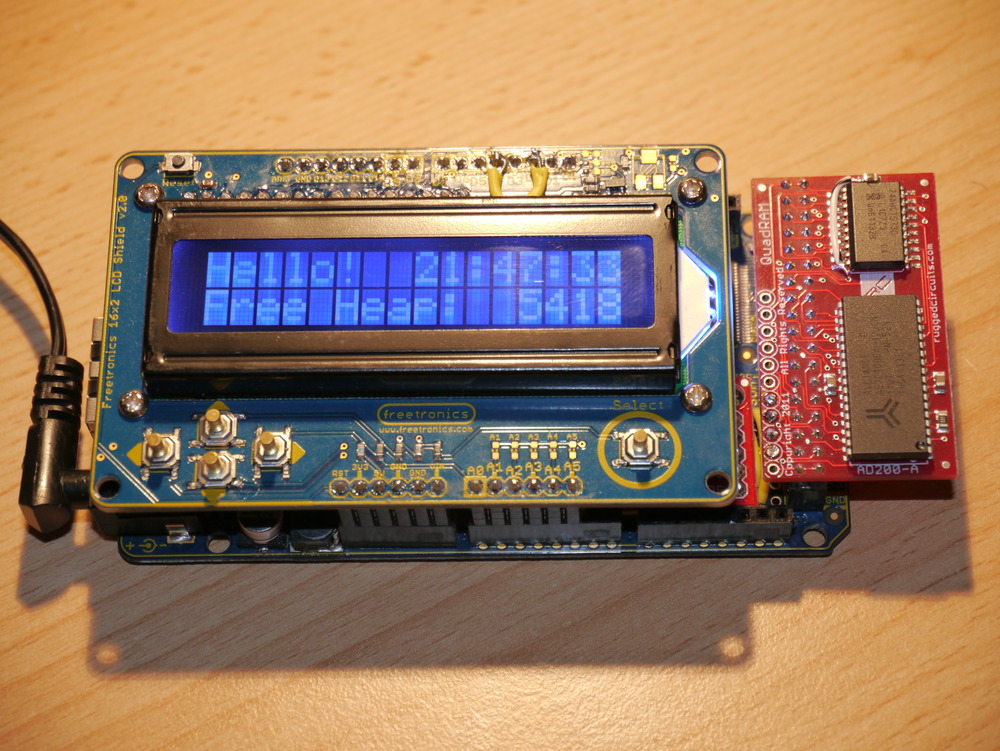
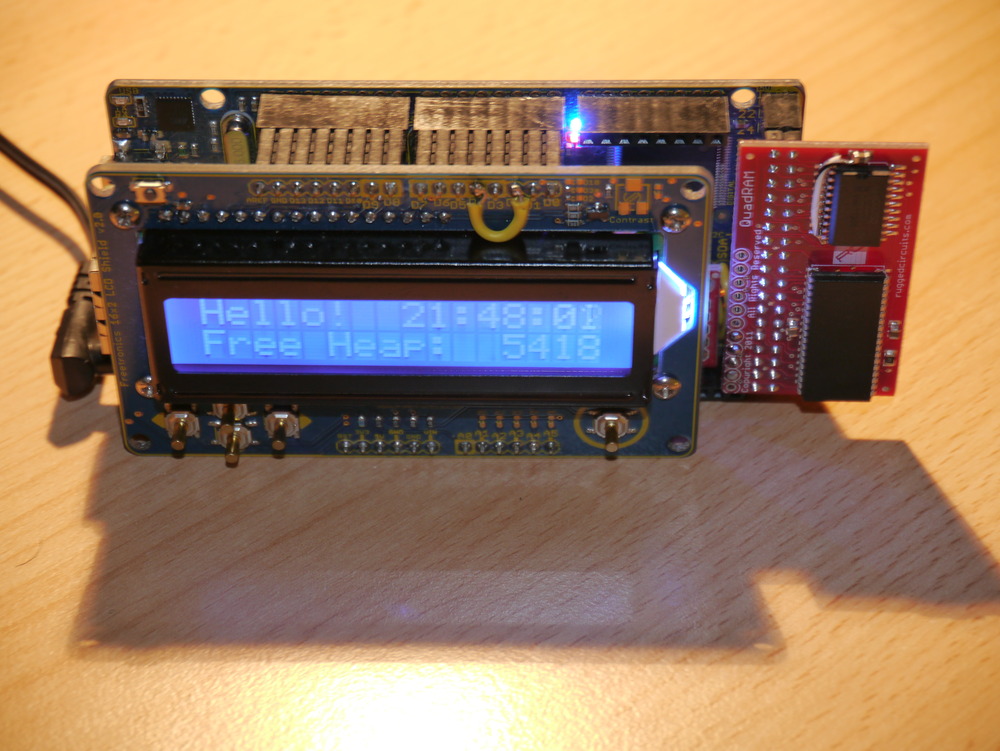
Recently, I also acquired a Freetronics 16×2 LCD-keypad-shield to use as a drop-on display for debugging and status, and anything really. It works really nicely and with its single pin switch analogue interface (which will be useful for navigation). Unfortunately there is a conflict between the SD Card device select pin on the EtherMega (Arduino pin D4) and one of the data pins on the 16×2 LCD.
My rectification of this pin usage conflict can be seen on the pictures below, where the yellow wire joins Pin D4 to Pin D2. What can’t be seen is that the leg of Pin D4 has been cut off, so it doesn’t insert into the EtherMega, so there is no elecrical connection between the D4 pin on the 16×2 LCD, and the D4 Pin used on the EtherMega.

Tools
Recently I purchased a Saleae Logic to use in developing. I have got to say that this is probably the best $149 that I have spent on any tool, ever. Having the ability to capture long periods (minutes) of data, with 24MHz resolution, and zoom, shrink, drag, flick around in it, and also compare many windows of alternative samples is just so great. It saves so much time being able to simply “see” what the device is actually doing on the SPI, I2C and serial ports, simultaneously, is well great. But I already said that.
Software – FatF File System
As usual, the code is on AVRfreeRTOS on Sourceforge.
My main work was to put the existing ChaN’s FatFs Generic FAT File System Module v0.9 into my existing ATmega2560 freeRTOS system, using my existing libraries, and generally being fully integrated into the system, as a plaform for some further work.
This was fairly time consuming (until I got my Saleae Logic), because the SPI bus transfers required to initiate and drive a SD card are complex, and depend on which version of SD card (MMC, SD, HDSD) is being used.
Now that everything is working, I’ve also done some SPI optimisation, to speed up multi-byte SPI bus transfers used for reading and writing to the SD card.
In testing with a Freetronics EtherMega driving an 4GByte HDSD card the system achieved the following results.
- Byte transfer cycle time: MOSI 3.750us, MISO 3.6250us
- Multibyte transfer cycle time: MOSI 1.3333us, MISO 1.3750us
- Gross Performance increase: MOSI 2.8x, MISO 2.64x
Measured performance for a multi-MegaByte file copy is about 140kBytes/s which includes both read and write operations to the same SD card.
Software – HD44780 LCD
As usual, the code is on AVRfreeRTOS on Sourceforge.
This was pretty straightforward, once I’d recognised the pin confict issue between the two Freetronics devices, and perhaps the most interesting things to say are:
- Using a macro to control the pin assignment means that it is very easy to change the pins used for any display type. Simply renumber them in the macro and it is done.
- Also, using the standard avr-libc stdio utility vsprintf formatting allows me to choose how much library I want to bring in. The standard library doesn’t support float formatting, but with a simple link switch either a simpler (smaller) or more fully featured (larger) standard library can be included. I also use the standard avr-libc tools for the serial port, so there is no additional overhead specifically for the LCD.
Wiznet W5100
Now I’ve finished the W5100 drivers from Wiznet, incorporating their new v1.6 changes (because they screwed up the silicon ARP state machine). And also, a fix for a subtle bug caused
by writing to the W5100 Tx buffer before it was finished with a previous transmission. This was fixed by checking the Tx read pointer and comparing it with the Tx write pointer. When the chip is idle, they are the same. That took me 3 weeks to isolate.
Now the fun part starts, which will be to re-learn the IP protocol suites, through re-implementing some of the standard network tools, like HTTP, FTP, NTP, DHCP, DNS, that we just take for granted. DHCP is done. Ping is done. HTTP is done.
Here is a web server running on this platform.