Recently, my Quad core UDOO board arrived in the post. Initially, I tried the two provided uSD cards, with Ubuntu 11.10 and Android 4.2.2. I was a little disappointed that the Android version didn’t seem to work out of the box, but probably I did something wrong. What was more disappointing was that the provided Ubuntu operating system Ubuntu 11.10, is already past End of Life. Releasing a brand new device with an EOL operating system; I’m not sure what the UDOO team (or actually Freescale) are thinking.
Ok, so It is time to go my own way to get something that will remain viable for the long term. I use Ubuntu 12.04 LTS on my machines that aren’t running debian. So it is natural that I’d try the same Ubuntu Precise LTS solution, which is supported through to 2017, on my UDOO board too.
A bit of searching found Dave Cheney, who has written about installing Precise on his UDOO quad. However, Dave assumes that there is a working UDOO Linaro system from which to derive the result. I didn’t have that starting point, so I needed to find a solution from the uSD card inserted into my amd64 (Intel) machine, and build from a chroot armhf on amd64 solution. Fortunately, there are some references for how to take this path too.
Following this initial process, there are quite a few steps to get to a desktop GUI from the very simple Ubuntu core file system starting point, none of which are documented clearly. So, knowing that I’d need to take this path again (after I break something) it is time to write the steps down.
Get all the pieces of code necessary
From the UDOO Downloads page, get the latest versions of U-boot, Kernel, and Kernel Modules, relevant for your UDOO. Either the Quad versions or the Dual versions.
From the Ubuntu Core page, download the ubuntu-core-xx.xx.xx-core-armhf.tar.gz latest version that is there when you read this. At the time of writing it is 12.04.3. I’m led to believe that any recent version of Ubuntu Core would also work (see comments). There’s plenty of opportunity to experiment.
Prepare the uSD Card
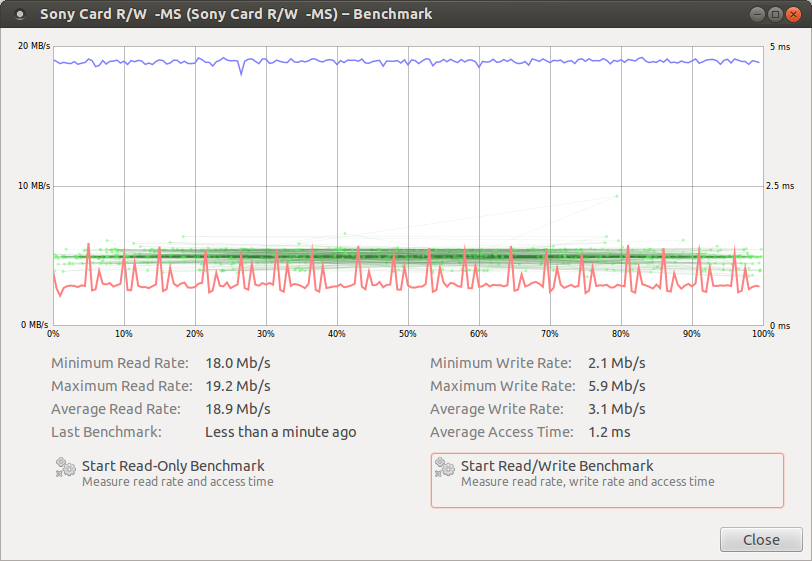
Use the largest uSD card that you can find. Also, get the fastest one available at a reasonable price. I have now loaded the system on to a Sandisk Ultra uSD card, and compared the speeds to a Sandisk “Black” card. It is worth getting a “faster” uSD Card for the operating system, but perhaps not especially the “fastest”. The Black card’s performance is quite variable, and particularly the Average Access time ranges from 1.4ms up to 3ms, whereas the Ultra card’s Average Access time is consistently 0.9ms to 1.0ms after repeated testing. The other parameters seem consistently similar.
Black (Class 4 ) Minimum 19.5Mb/s Maximum 22.4Mb/s Average 21.0Mb/s Access 1.5ms
Ultra (Class 10) Minimum 19.6Mb/s Maximum 22.5Mb/s Average 21.0Mb/s Access 0.9ms
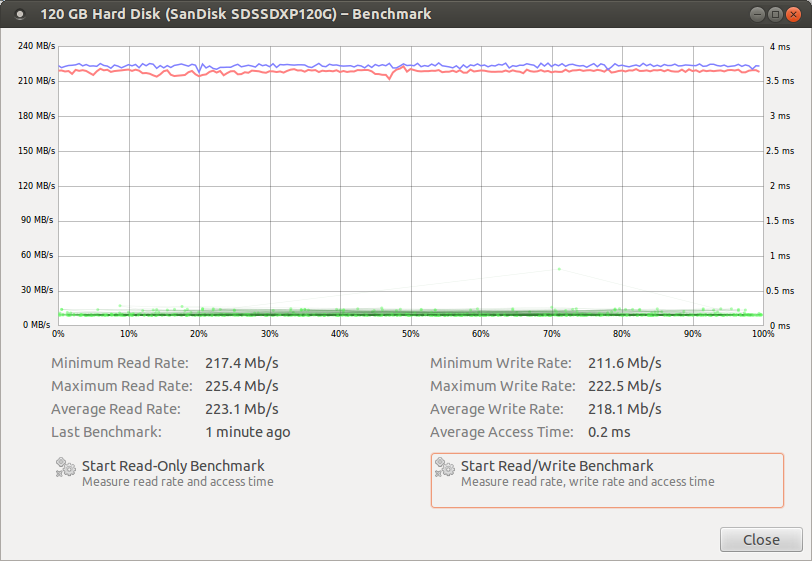
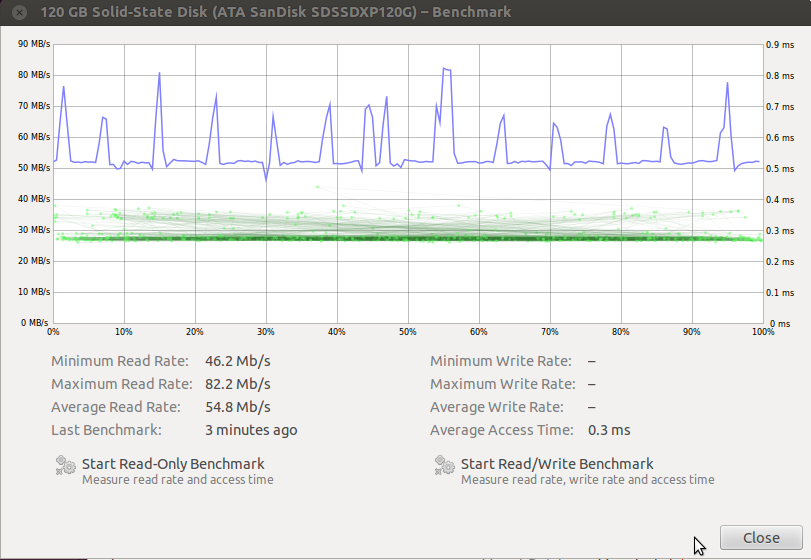
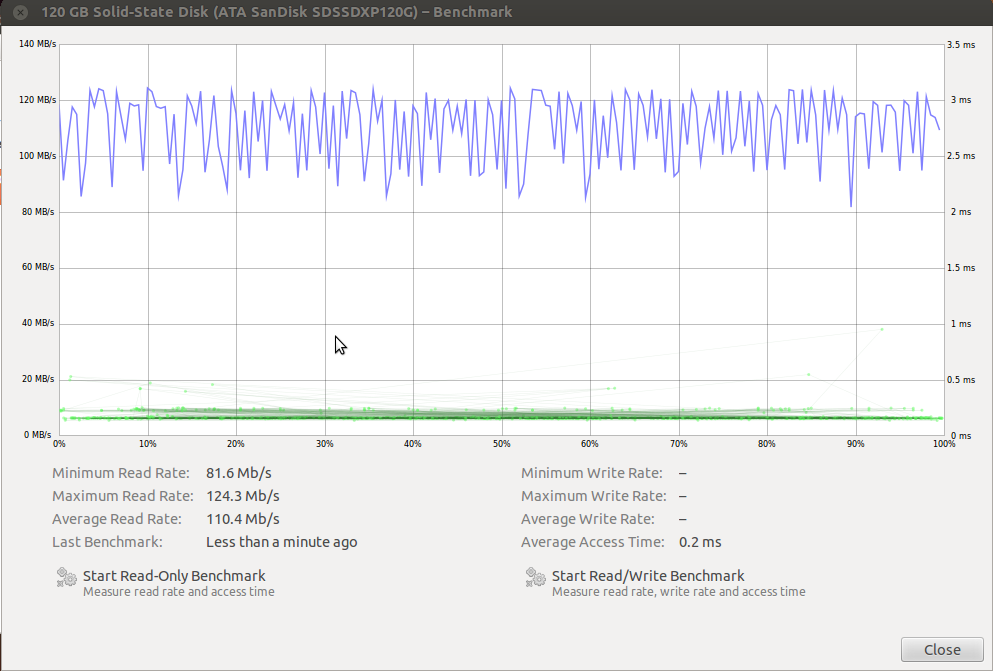
I have done some testing with a SATA SSD to compare it with these uSD Cards. If you can use a SSD as the root disk, then you’ll have a much more responsive experience.
Extreme ii SSD Minimum 81.6Mb/s Maximum 124.3Mb/s Average 110.4Mb/s Access 0.2ms
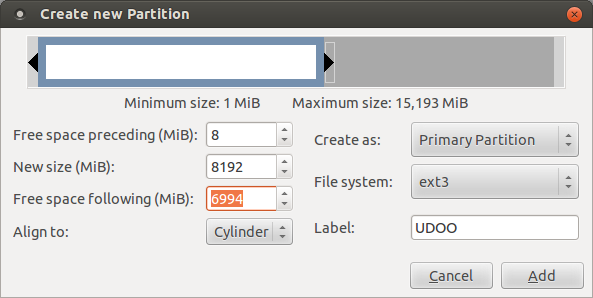
The elinux wiki has instructions for creating a bootable uSD card for UDOO. These are easy to follow, so I’ll not repeat all the details here. Using GParted I only left 8 MByte space before the start of the primary partition, and I labelled it “UDOO”. I also split the card in half, creating a secondary partition for the /home partition. This may take some time to complete, if your uSD is slow…


Before mounting the newly created filesystems, install the U-boot file into the first 8 MByte of the uSD card. Be sure to pick the descriptor for the root of the card (not the first partition). For me <MICROSD_DEVICE> is /dev/sdg.
Be very sure you’ re using the correct device; using the wrong device identifier will result in the loss of all data on the Hard Drive of the host PC used as you will overwrite the MBR.
sudo dd if=u-boot-q.imx of=/dev/<MICROSD_DEVICE> bs=512 seek=2
Create the Filesystem
Mount the just-created root partition on the uSD card. It will appear at /media/UDOO if you chose the same label as suggested. Then extract the tar.gz file containing the file system onto the uSD card with the following command, where <NAME_OF_TAR_FS> is the Ubuntu Core file downloaded previously.
sudo tar -xzvpf <NAME_OF_TAR_FS> -C /media/UDOO/
First, extract the Kernel Modules to the same current folder, and then copy the Kernel file and the Kernel Modules to the uSD.
sudo cp -p uImage /media/UDOO/boot
sudo cp -rp lib/modules/* /media/UDOO/lib/modules/
So, now the uSD card is complete, and the new Precise UDOO should boot.
But wait,… there’s more. The Ubuntu Core is absolutely the minimum required to get started. There’s not even a user defined, so if we want to log into the new system we have to do a little more to get ourselves started.
Chroot from amd64 into armhf
To be able to execute armhf commands from an amd64 platform we need to use qemu. So for that to work we need to make sure we’ve got qemu installed on the host platform. Check using dpkg.
dpkg -l qemu-user-static
Have your SD Card mounted on your Linux PC and go to your Ubuntu Core folder:
cd /media/UDOO
Copy the qemu for arm file:
sudo cp /usr/bin/qemu-arm-static usr/bin/
Make sure you have your network settings properly configured:
sudo mv etc/resolv.conf etc/resolv.conf.saved
sudo cp /etc/resolv.conf etc/resolv.conf
Then, mount sys, proc and dev:
for m in `echo 'sys dev proc'`; do sudo mount /$m ./$m -o bind; done
Finally, chroot into the target filesystem:
sudo LC_ALL=C chroot . /bin/bash
You are now in your ‘chroot’ which means you can run commands as if you were on your target ARM device.
Using the ‘chroot’
The first step is to verify the network connection is fine. You can run:
apt-get update
You are now ready to install any new package in your Ubuntu Core Filesystem using APT tools.
In the armhf ‘chroot’
Now we can do some commands to make the UDOO environment more complete.
apt-get update
apt-get install apt-utils whiptail language-pack-en-base
dpkg-reconfigure tzdata
apt-get upgrade
apt-get install sudo vim-tiny less net-tools openssh-server wpasupplicant isc-dhcp-client ntp #(and any other packages you want)
Adding a user
Out of the Ubuntu Core box, there is no user defined. so we have to add at least “SOMEUSER” to enable us to log into the system.
adduser SOMEUSER
adduser SOMEUSER adm
adduser SOMEUSER sudo
Fixing the Console
The UDOO serial port (the uUSB connector closest to the corner of the board) operates at 115200 baud, but by default the Ubuntu Core image is not configured to take over on /dev/console at the correct baud. The simplest solution to fix this is to copy the tty1 configuration to the console configuration, and then adjust to the correct baud rate.
cp /etc/init/tty1.conf /etc/init/console.conf
vi /etc/init/console.conf
change the last line to
exec /sbin/getty -8 115200 console
Enabling the Ethernet
The wired Ethernet port is not automatically enabled. Edit the interfaces file and add two lines.
vi /etc/network/interfaces

auto eth0
iface eth0 inet dhcp
Other Niceties
Obtain the Ubuntu universe packages. The /etc/apt/sources.list file has most of the sources commented out. These comments should be removed, before installing a GUI.
vi /etc/apt/sources.list
Leaving the ‘chroot’
If you want to get out of the ‘chroot’ just type:
exit
Un-mount the target filesystem: Make sure you stay at the UDOO root point /media/UDOO/ and run the following commands. Go back to the original network settings. And the qemu can be removed too.
for m in `echo 'sys dev proc'`; do sudo umount ./$m; done
sudo mv etc/resolv.conf.saved etc/resolv.conf
sudo rm usr/bin/qemu-arm-static
sync; sync
Booting into UDOO Precise LTS
Insert the new UDOO Precise LTS file system uSD into the appropriate place, and then start up the serial console to watch the system boot. The serial port uUSB connector is the one closest to the RESET button, and should be connected at 115200 baud 8n1. It will appear on an amd64 Ubuntu machine as /dev/ttyUSB0.

When the system is booted the hdmi interfaced terminal should work successfully too. Use the login details you created above to log in, and profit!
Building the Desktop
From this point it is possible to install the GUI of choice. I have tried with LXDE, but given this is a Quad Core device, it may well run well with the standard Unity Desktop.
Installing LXDE or Unity (the standard Ubuntu desktop) can be done once you’re logged into the UDOO board, by either of these commands.
sudo apt-get install lxde-desktop
# OR
sudo apt-get install ubuntu-desktop
Once you have rebooted into your new desktop, it is useful to move the home directories over to the second partition that was prepared. The full desktop environments identify the second uSD partition and mount it automatically as /media/home.
sudo cp -rp /home/* /media/home
Edit the /etc/fstab file to get the partition to mount at /home, and reboot.
One thing missing (in a short amount of testing) is the firmware for the WiFi device. The best place to find the latest firmware-ralink is in the debian Sid repository. It is the same file for all architectures.
sudo dpkg -i firmware-ralink_0.43_all.deb
Final Thoughts
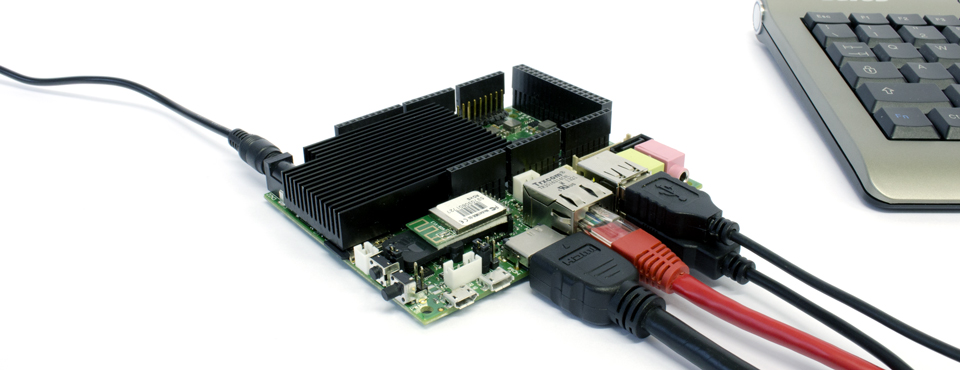
Compared to the Raspberry Pi the UDOO environment certainly runs very hot. The large heat sink on the UDOO is very necessary, whereby the Raspberry Pi doesn’t even need a heatsink. I guess that Freescale has packed a lot more (4x more?) into the same space that Broadcom used for its design, and that consumes more energy. Certainly, the lack of a GPU driver module and user space tools for the display, forcing software rendering doesn’t help. Hopefully Freescale will get their act together soon and Open Source the Vivante GC2000 driver code, or at least the hardware definitions to allow the Etnaviv team to progress quickly.
Neither Raspberry Pi nor UDOO are capable of being battery powered devices, which makes them pretty useless for any Internet of Things sensor project, IHMO. So, I’m not sure what kind of applications they’re really trying to address? Doesn’t matter, they’re still pretty cool devices and I’m going to be using the UDOO often.